Refashioned Linen Shirtdress

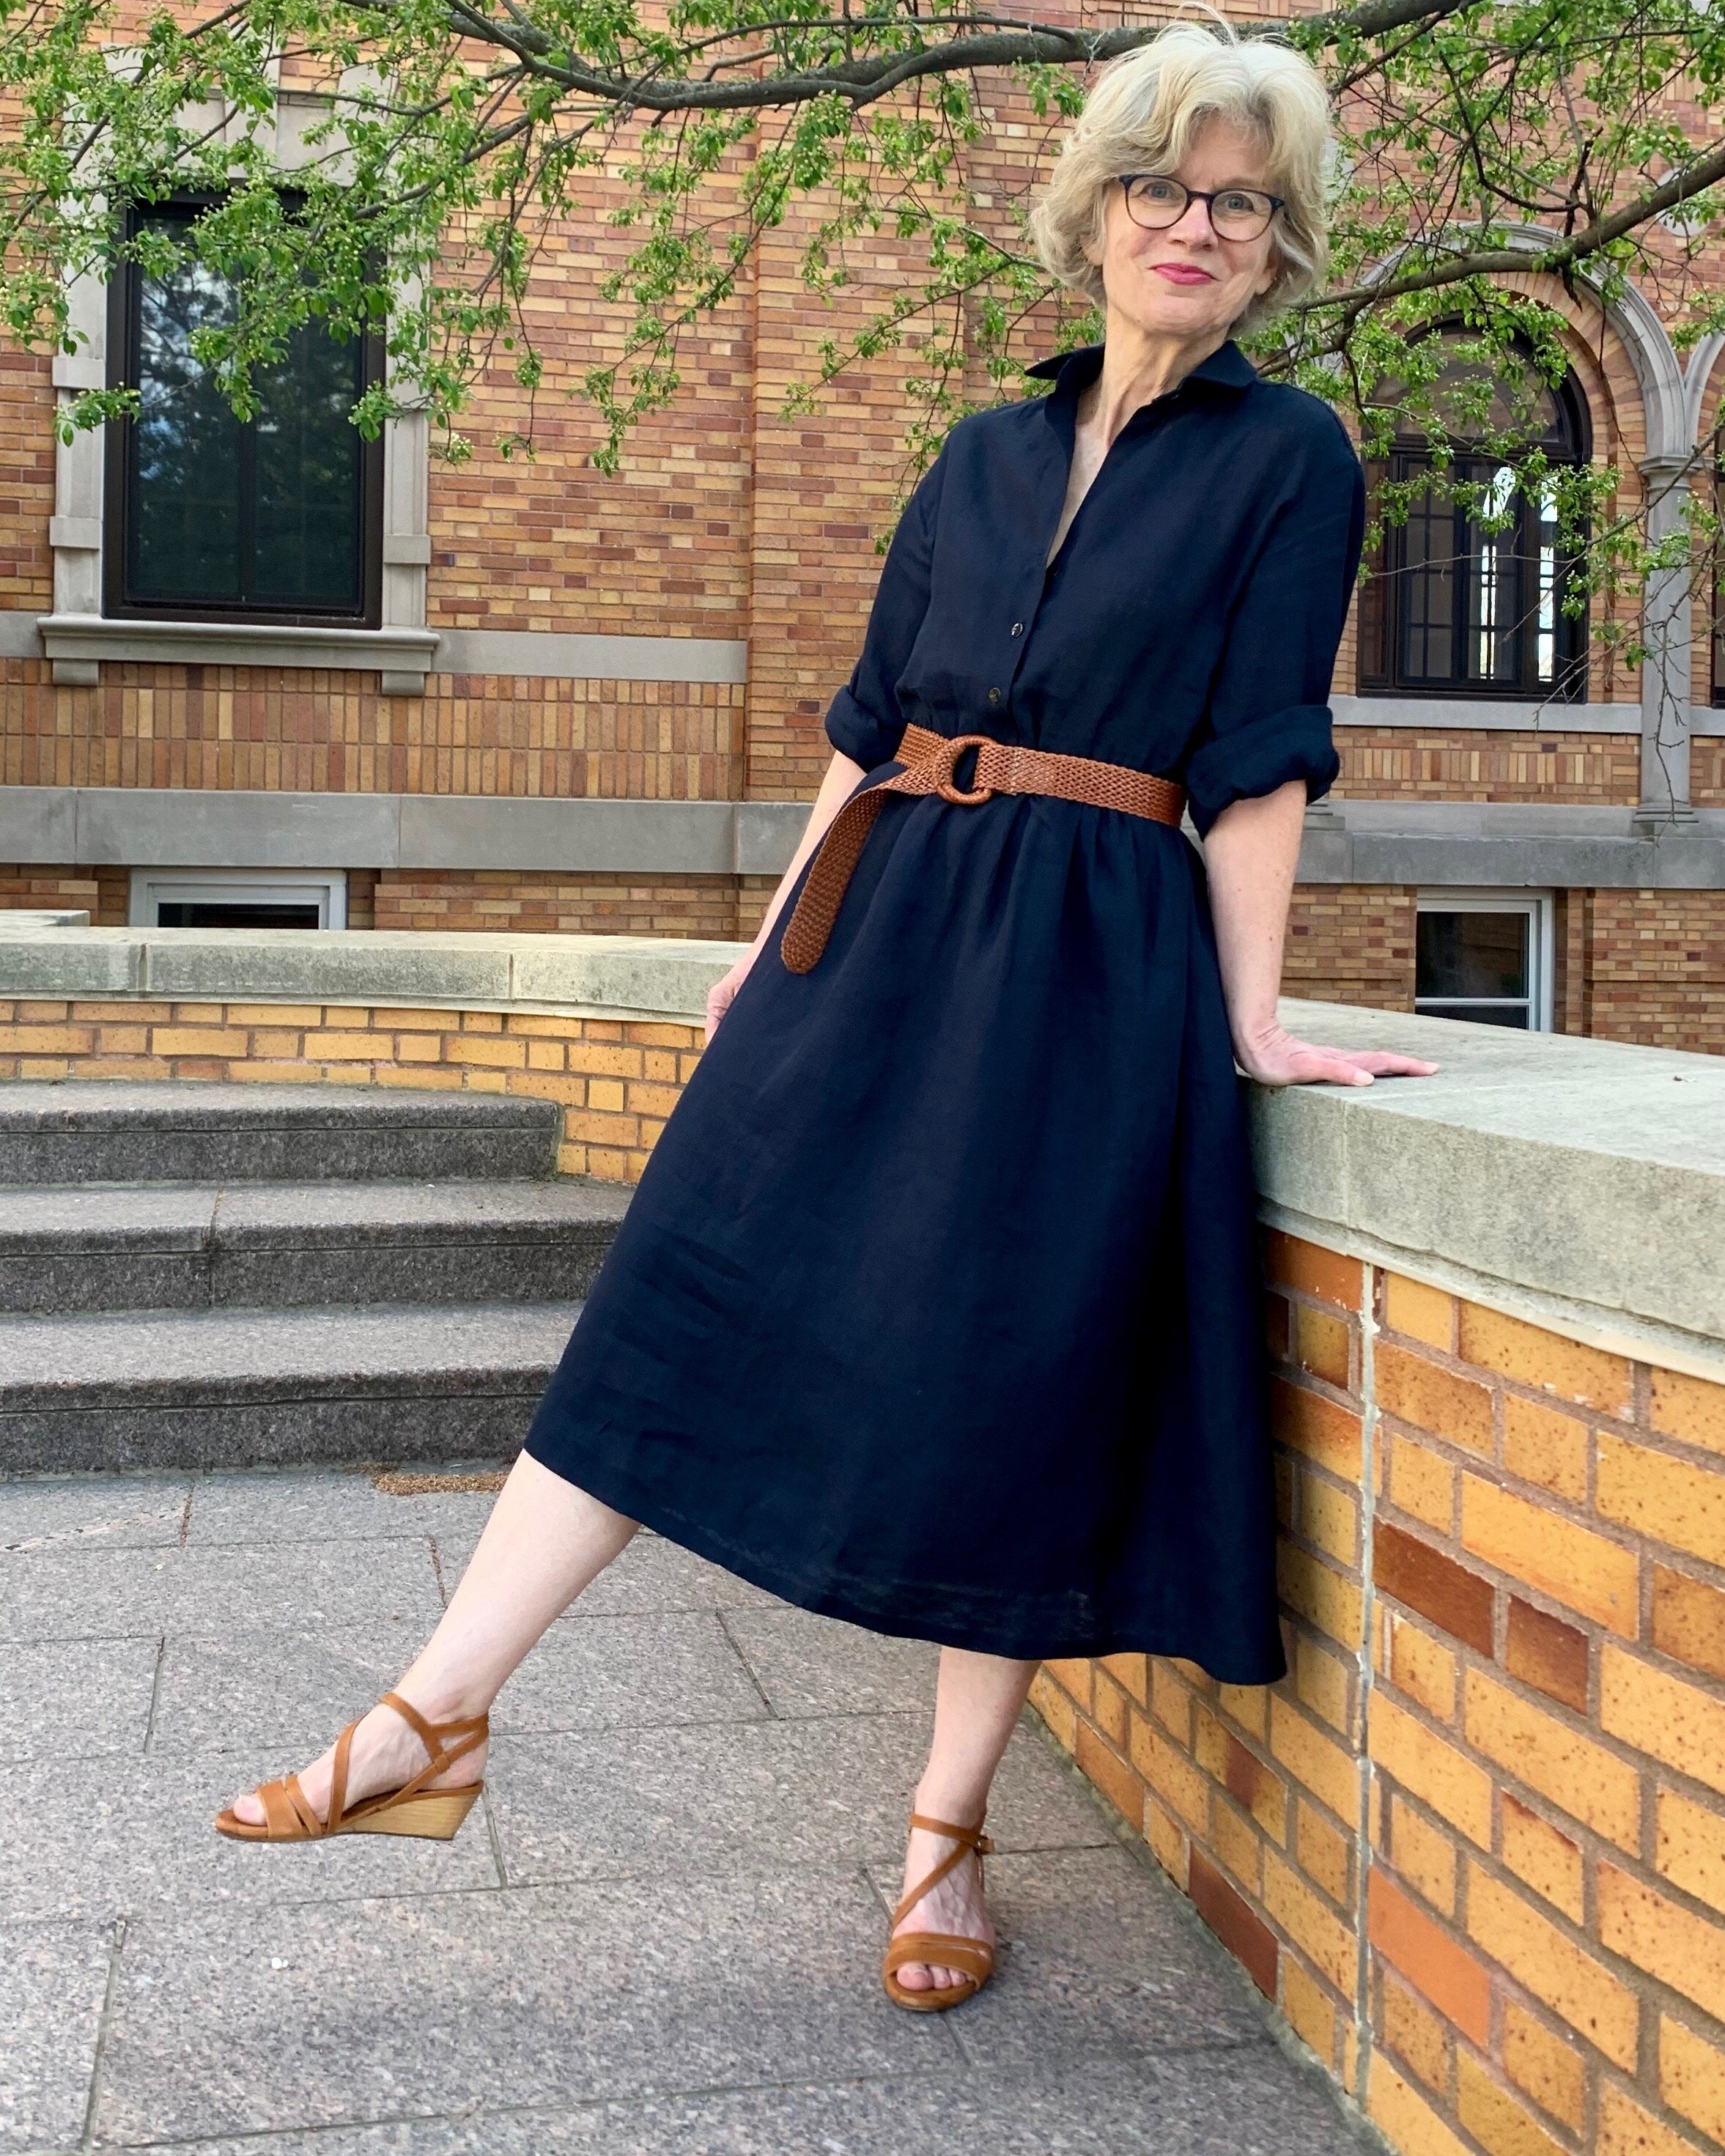
Here’s a story about a remake times two.  I have a navy linen shirtdress that I made for myself several years ago that proved to be an amazing wardrobe work horse.  It was appropriate for practically every occasion: work, travel and play -dressy or casual.  But- years later- it is now too faded and too small/short? to keep performing it’s all star role in my closet.  I wear it around the house, but that’s about it- so I set about making a replacement.

IMG_3308.jpg

I started this replacement shirt dress saga by making a kind of mashed up and hacked version of Grainline Studios’ Archer and Adler patterns. I have made several Archer shirts (blogged about here) and often use it as a base for other tops and dresses. For some reason, I was feeling extra and I added a waistline and a very big gathered skirt.  This particular linen- purchased from Stone Mountain and Daughter Fabric -is a little bit opaque, so I thought a full skirt would eliminate the need for a lining- and maybe I was having a ball gown moment.

IMG_3572.jpg

If we are talking about versatility- I think navy is a champion color and I have quite a bit of it in my wardrobe. Linen is also definitely an all-around versatile fabric.  This particular light weight linen has dual magical properties: it is both crisp- see that collar- and it drapes.

IMG_3890.jpg

I had fun twirling around in the dress for pictures and I liked it styled with different belts and shoes for different feels- but after the picture-taking session, the dress hung unworn in the closet – and lingered unworn, and almost disappeared.  What the heck?  I made this expressly because my other navy dress was so wearable.

 So I decided the dress needed a significant overhaul- or refashion -to make it more wearable.  I made a few key changes to the skirt and sleeves to give this dress a more easy going, laid back and much less structured feel. 

IMG_6324.jpg

Let the unpicking begin! First, I completely took off the skirt and reduced the fullness, which made a big difference in the feel of this dress. I added a full button closure down the entire length of the skirt, and I also attached a casing and made a drawstring waistline for comfort and super easy style.  Last, I shortened the sleeves to relaxed elbow length.  Now it’s a great one and done every day kind of dress.

IMG_6805.jpg

It feels more versatile and I can still change it up a bit with belts, shoes and other accessories.

IMG_6635.jpg

I love how linen is a season spanning fabric.  This navy linen is suitable when the weather is cool, and we all know linen is the perfect fabric in a heat wave- and (surprisingly) it actually gets very hot and humid here in Minnesota in the summer. I wore the dress to brunch on the patio this weekend in extreme heat and it was perfect. This navy shirt dress- third edition- is a winner.

IMG_6267.jpg

Tiger Toile Fabric Crush

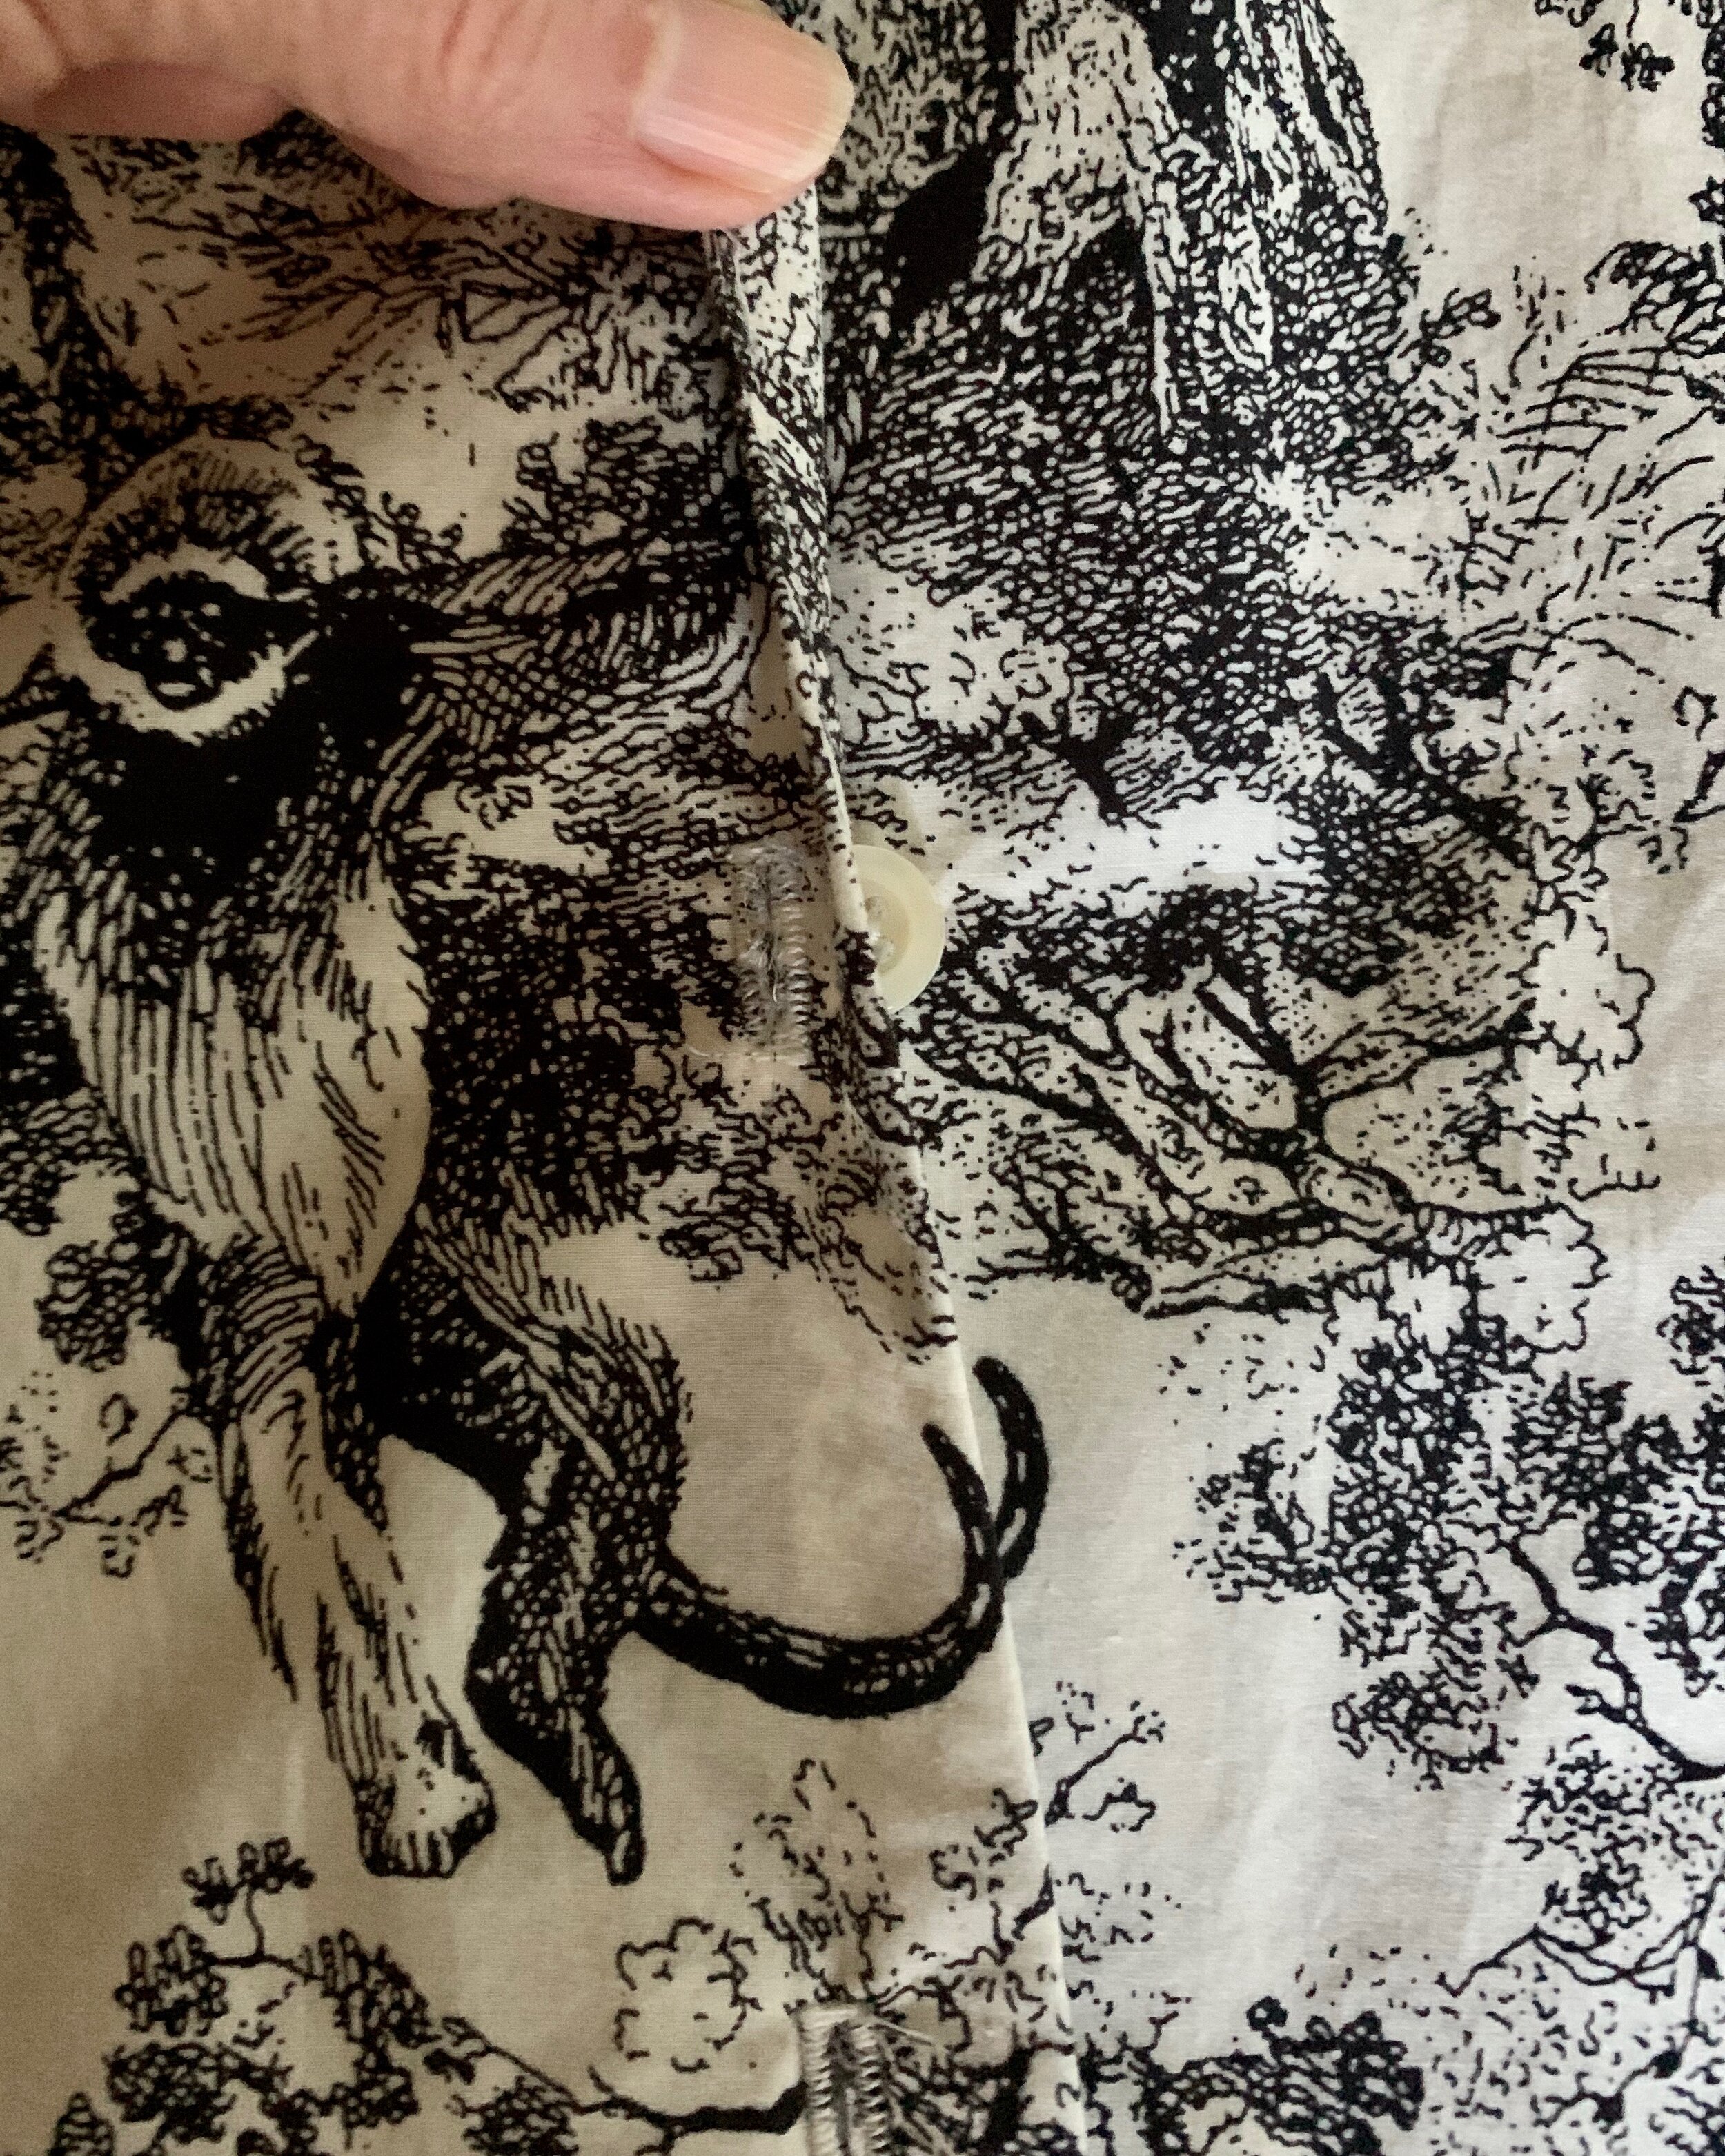
When it comes to fabric love, I tend to fall hard and fast for prints- even though my head tells me solids are more versatile.  I am thoughtful about solid color fabric purchases and- typically - thoughtfully making a purchase for a specific purpose. But when it comes to prints- the heart takes over and I simply purchase because I love it without a clear idea of what the fabric will ultimately become. That was the case with this jungle toile cotton lawn from Stone Mountain Fabric, sadly- no longer available.

IMG_1177 (1).jpg
IMG_1357.jpg

Even though I fell head over heels for this fabric, I wasn’t ready to commit to a pattern for months. This fabric is a prefect shirting weight- it has a little crispness but it is still lightweight, so I was leaning to making a shirt dress- I know -predictable.  As I was deliberating over styles ad nauseam, I did some poking around online- which is my preferred mode of procrastination.  To my surprise and delight, I stumbled across a designer item that looks pretty much identical to my adored fabric here  - yes- that is Dior!!! I feel pretty self-satisfied and rather smug about my print purchase. In addition, this internet intelligence also sealed the idea to make a shirt dress.

IMG_1159.jpg
IMG_1333 (1).jpg

With special fabric, it is much less stressful to use a tried and true pattern, so I went with my favorite and perfect fitting shirt dress pattern – Simplicity 8014.  There are plenty of skirt and sleeve options- I chose a straight cut for comfort.  The only modifications I made were to add a cuff to the short sleeves and put a pleat in the back instead of gathers. Happily, I think the style works with and without a belt.

IMG_1166.jpg

 I spent what feels like the better part of the day fiddling with pattern placement.  I had to be careful with where the tiger rear ends landed on the body of the dress.  This is very rare precaution for me- being a somewhat hasty sewer at times- but I cut each front piece separately to allow for pattern matching.  I actually don’t know how to systematically pattern match when the design is such a large repeat- I should do some research.  I was very trial and error about it- but look at the final match.

IMG_1546.jpg

 I typically finish my shirts with French seams, but for this model I went with mock flat felled seams following the Colette instructions here.

IMG_1550.jpg
IMG_1245.jpg

 I understand a shirt dress may be a rather staid and safe choice, but this print is so fabulous, I think this style lets the fabric do the roaring.

IMG_1102.jpg


Kalle-luia

At long last, I can join the legions of sewists who made and adore the Kalle Shirt dress by Closet Case patterns.  

IMG_5820.jpg

Despite being late to the Kalle party, I am tickled pink with my very wearable toile. I am also absolutely in love with this charming cotton print from Liberty of London with its life gives you pink lemons way about it.

IMG_5915.jpg

 I made version C of the Kalle shirt dress with a few modifications.  The biggest change is I eliminated the pleat in the back which reduced the fullness of the dress substantially. I cut my dress with a straight and even hem.  With the reduced fullness it made sense to square the hemline.  It was also a design choice out of necessity as I didn’t have enough fabric for the curved finish.  I did squeeze out a self-fabric tie which I tied in a bow when wearing above. If the bow seems a bit too frivolous, I can simply knot the tie. This is my third go with Closet Case patterns and I find the instructions and drafting spot on.

IMG_5903.jpg

This adorable cotton Liberty print that I used is a quilting cotton.  Quilting cottons are so plentiful and available in so many fetching prints.  I have no qualms about using quilting or home decorating cotton for making garments and have expressed my particular love of gingham in an earlier blog post.  Quilting cotton comes in different weights, but generally quilting cotton is medium weight and quite a bit stiffer than apparel cotton.  The finish is also a little more casual and home-spun which you can see below. Cotton shirting and other higher thread count plain weaves will provide a more polished smoother and silkier finish.  

IMG_6885.jpg

I purchased this enchanting quilting cotton from Lakes Makerie. I forgot how easy and carefree it is to work with quilting cotton.  The fabric is so stable- no slipping and sliding -making sewing and cutting super straightforward. Also, because it is a natural fiber it is somewhat malleable- it irons up sharp and holds a crease.  All of these properties are perfect for a structured shirt dress.  Because this was medium weight, I didn’t need to interface my self tie. I used French Fuse interfacing for the collar and plackets which worked a charm. The other benefit of using quilting cottons is they are more affordable than apparel fabric which makes them perfect for making a toile. The only stumbling block with this fabric was figuring out which way was up- design-wise.  I may have gotten that wrong!

My shirt making skills are always improving as I continually learn more and more techniques (tricks) for better outcomes.  For this project I tried a new system for the collar stand.  I used a template for the collar as a guide to sew more perfect and even curves in front.  To do this, I traced the collar stand pattern on sturdy paper and then laid the paper template on the fabric collar stand and sewed around the template as shown below.

IMG_5613 (1).jpg


Smarter in a shirtdress?

It’s summertime and super hard to pay attention at work when the days are warm and perfect.  Will this smart looking shirt dress help me focus?  Does clothing impact performance?  I read studies that show wearing formal clothes increases abstract thinking, improves test scores, and improves negotiation outcomes.  I also read a super interesting study that found people made half as many mistakes on a complicated task when wearing a white lab coat. Well, I don’t have a lab coat, maybe next project…?

Even if this dress doesn’t improve my work product, it’s a smart option for summer work and other outings.  The pattern is the tried and true Simplicity 8014 with a modified skirt.  The fabric is a stretch cotton woven from Mood from my deep stash. 

IMG_8783.jpg

Neckline Strategy:  I came up with a simple solution for a “just-right” neckline plunge on this dress. I knew that I would never wear this dress buttoned up to the top- the fabric is a stretch twill and too heavy for that.  So, I tried the dress on and marked an ideal closure point for a not too low- not too high neckline and started my buttons from that point down.  Easy and perfect positioning- also no need to think about how many buttons to leave undone- and you save on unnecessary button and buttonholes.   Genius!!!

IMG_9397.jpg

This is a straightforward shirt dress.  I lined the back yoke with a Liberty of London scrap- which makes it cute and cool. The fabric was great to work with- very little fraying- see sharp looking collar grading below.

IMG_3879.jpg

The only other decision point was the belt option.  I tried this dress with a few belts on hand.  But did the leopard print cancel any possible performance advantage?

IMG_8906.jpg

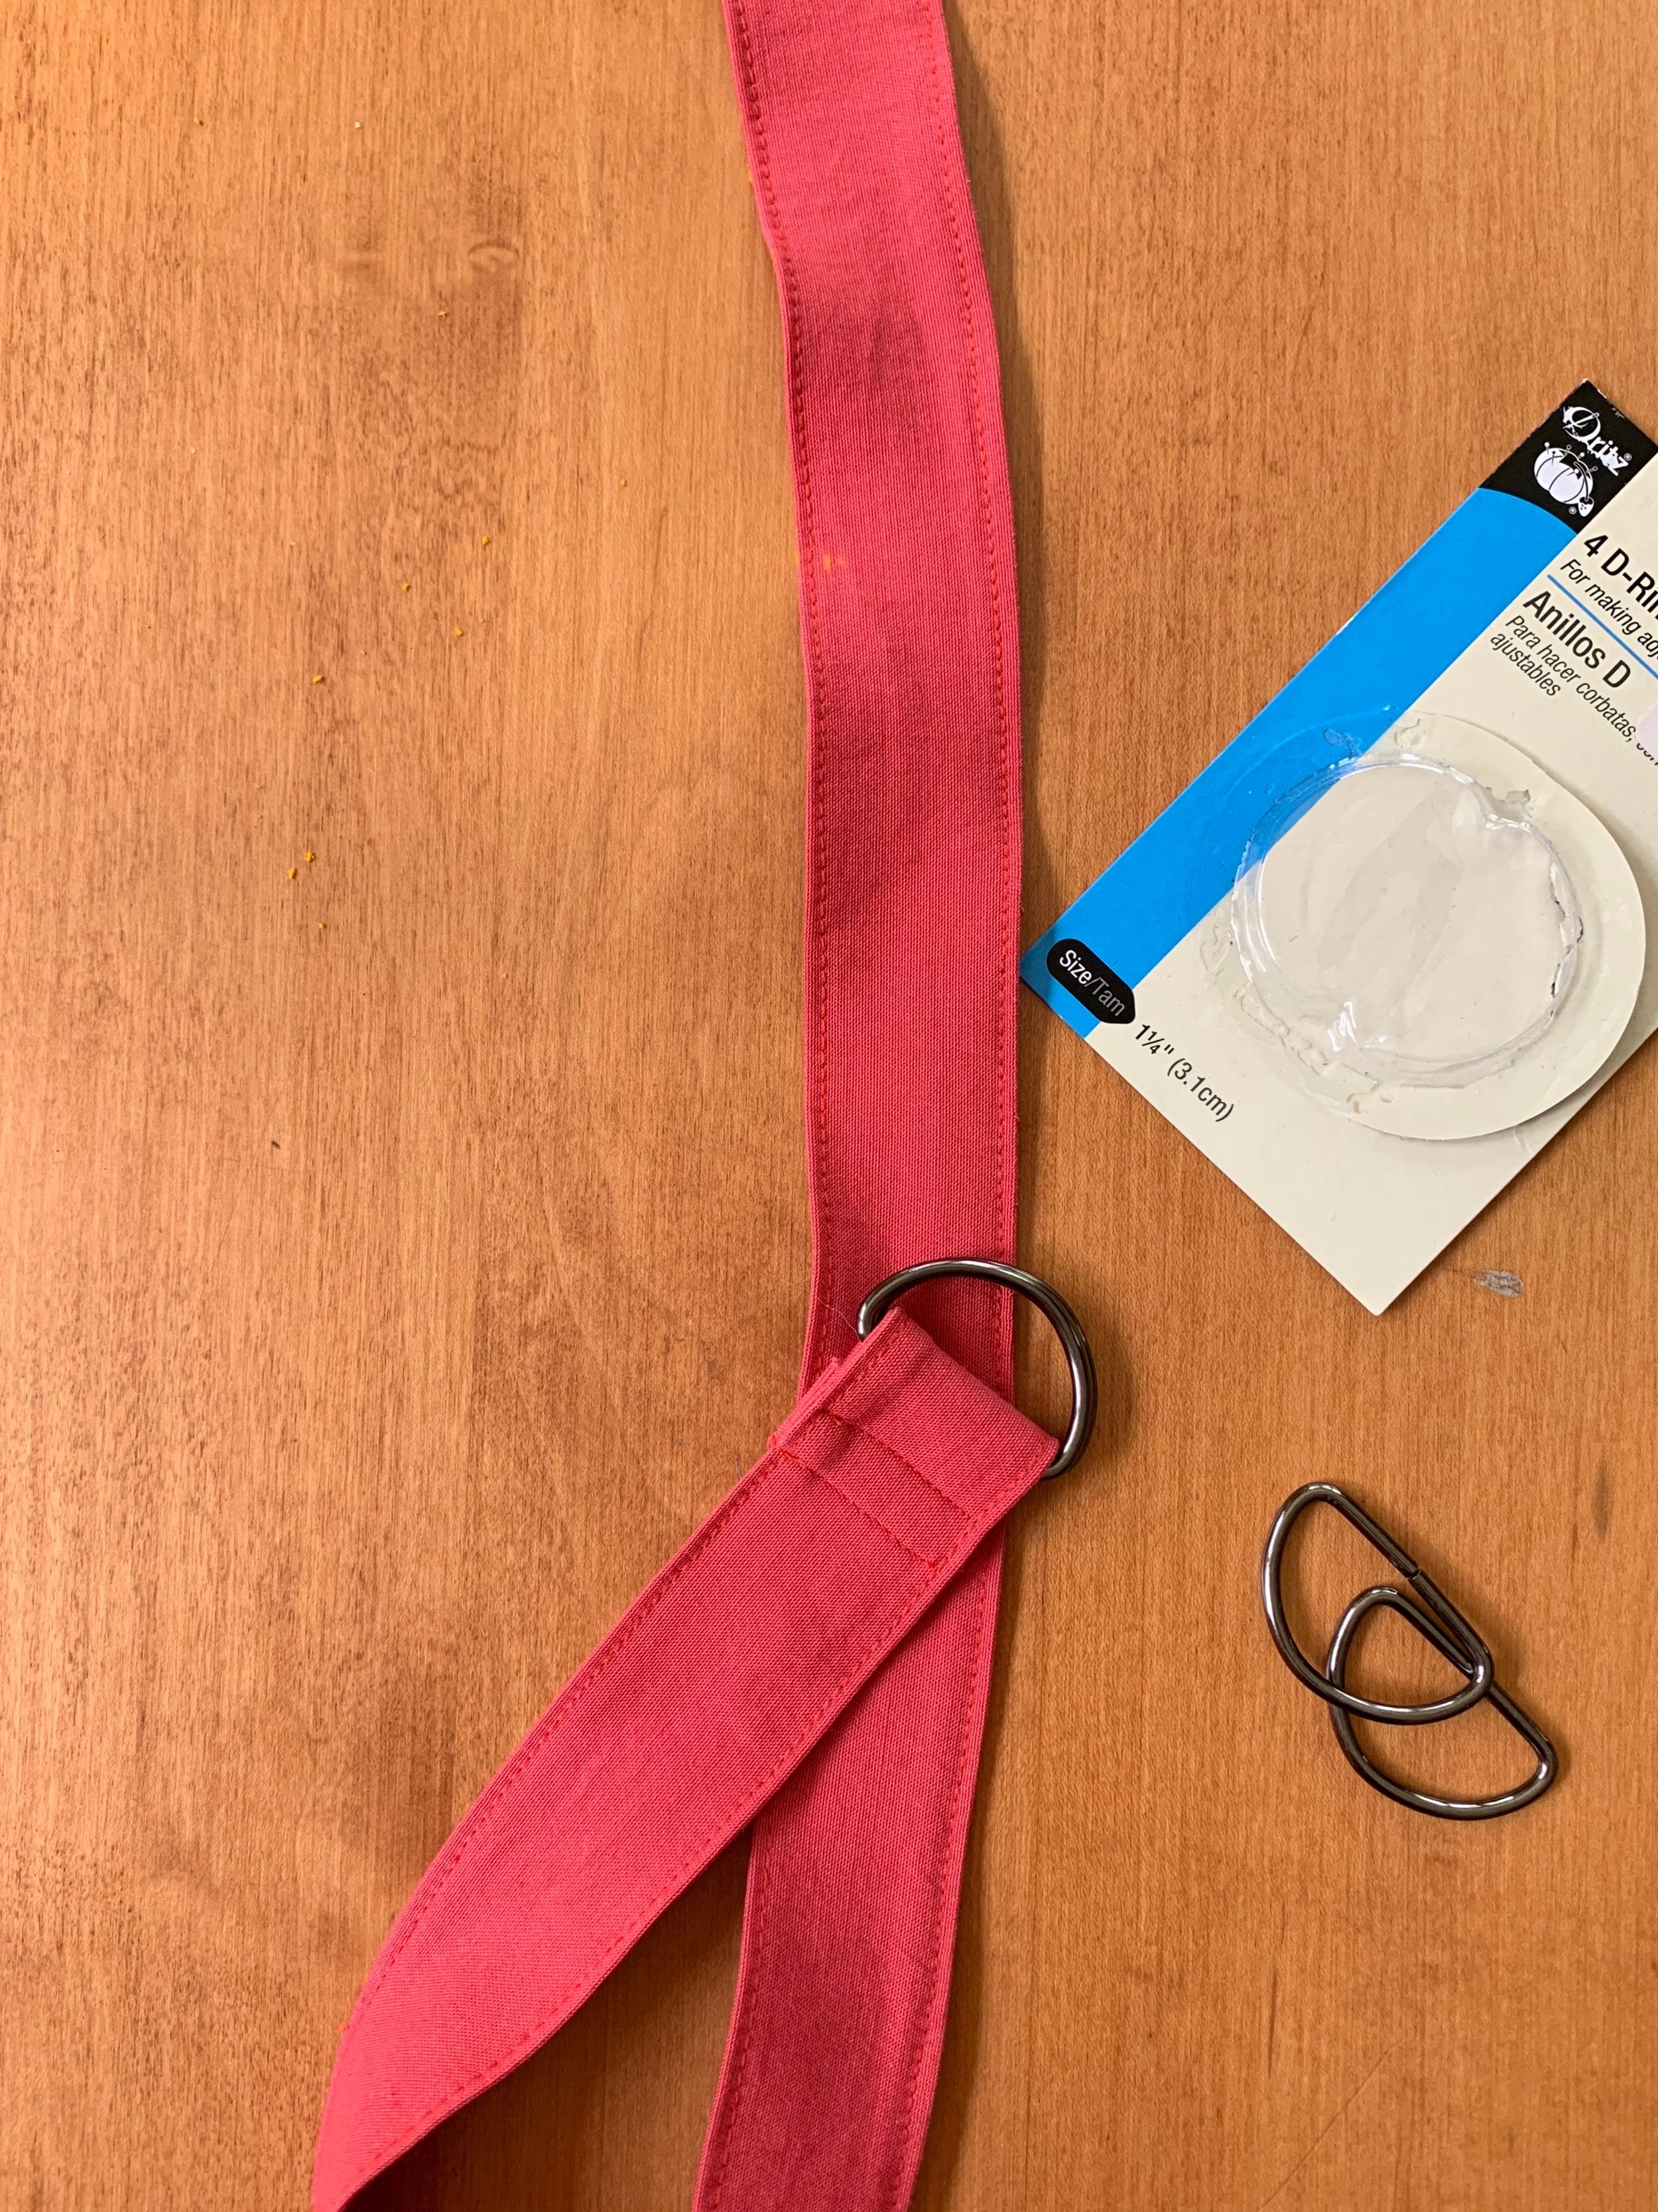
I decided I wanted a clean, monochromatic look, so I made a self-fabric D-Ring self belt.  Simply cut a rectangle 2 1/2 inches by desired belt length.  Interface to your stiffness preference and sew a tube. Turn and topstitch attaching the D-rings on one end.

IMG_9402.jpg