A scrappy shift dress

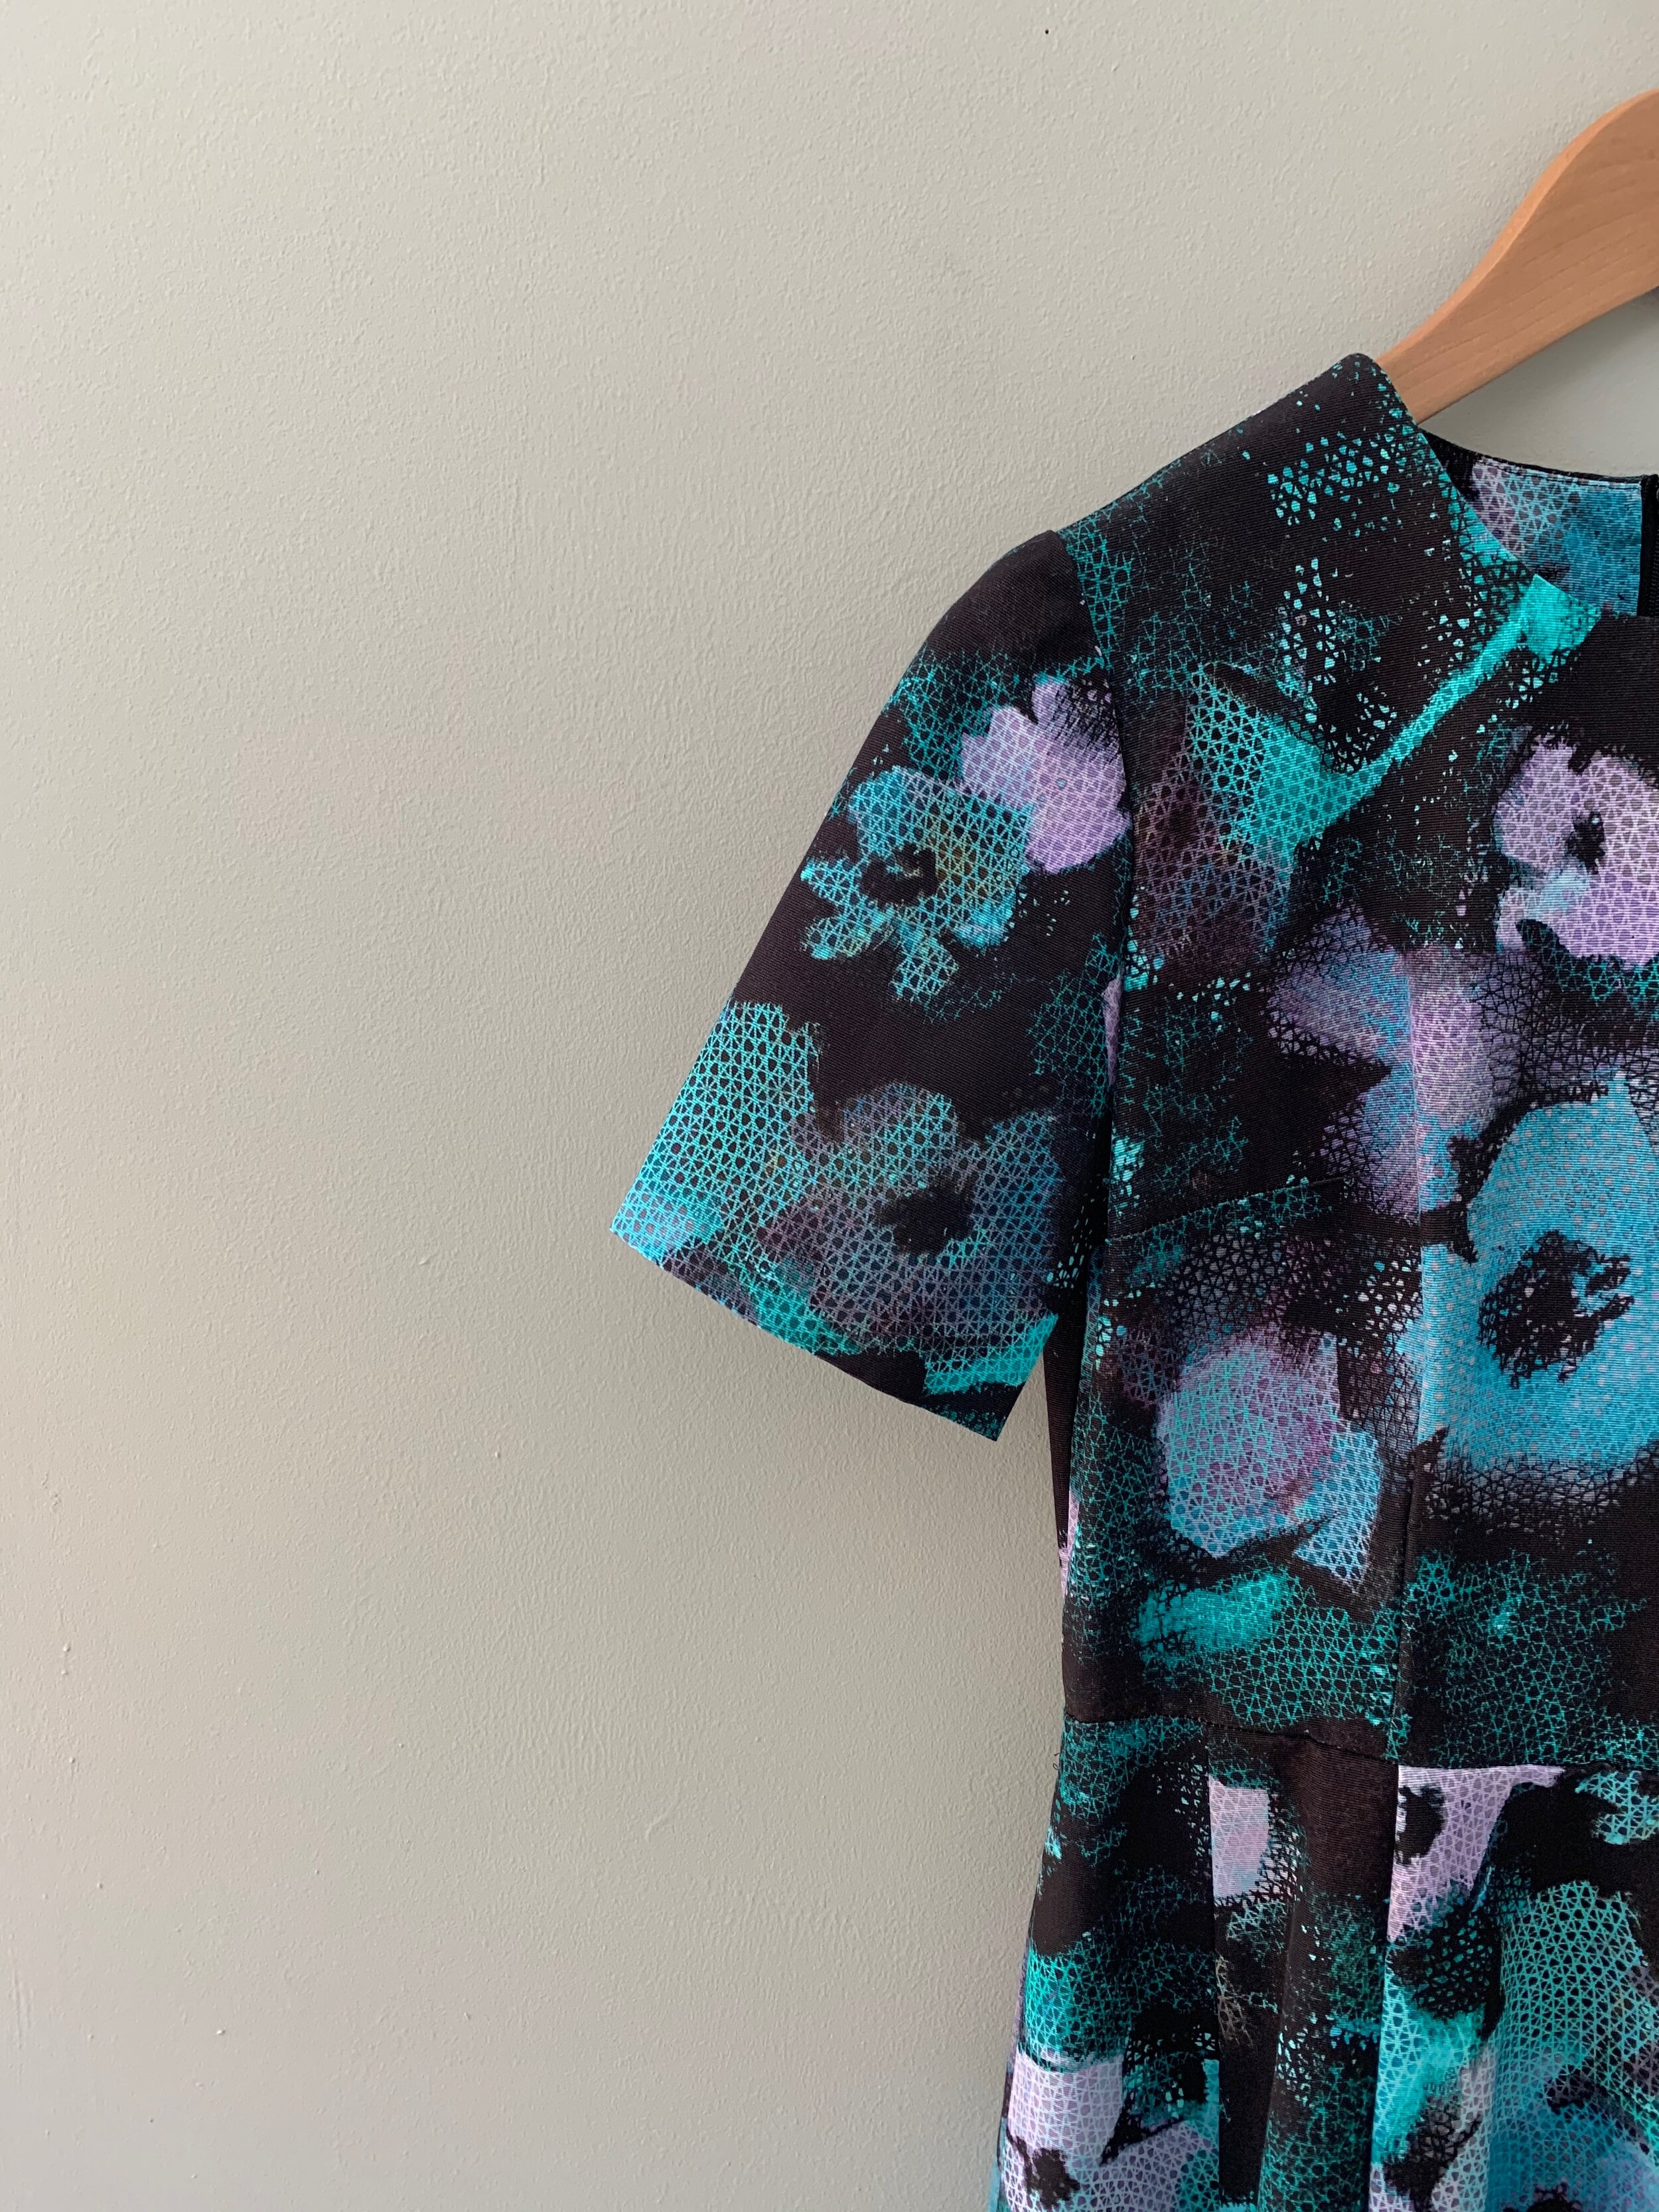
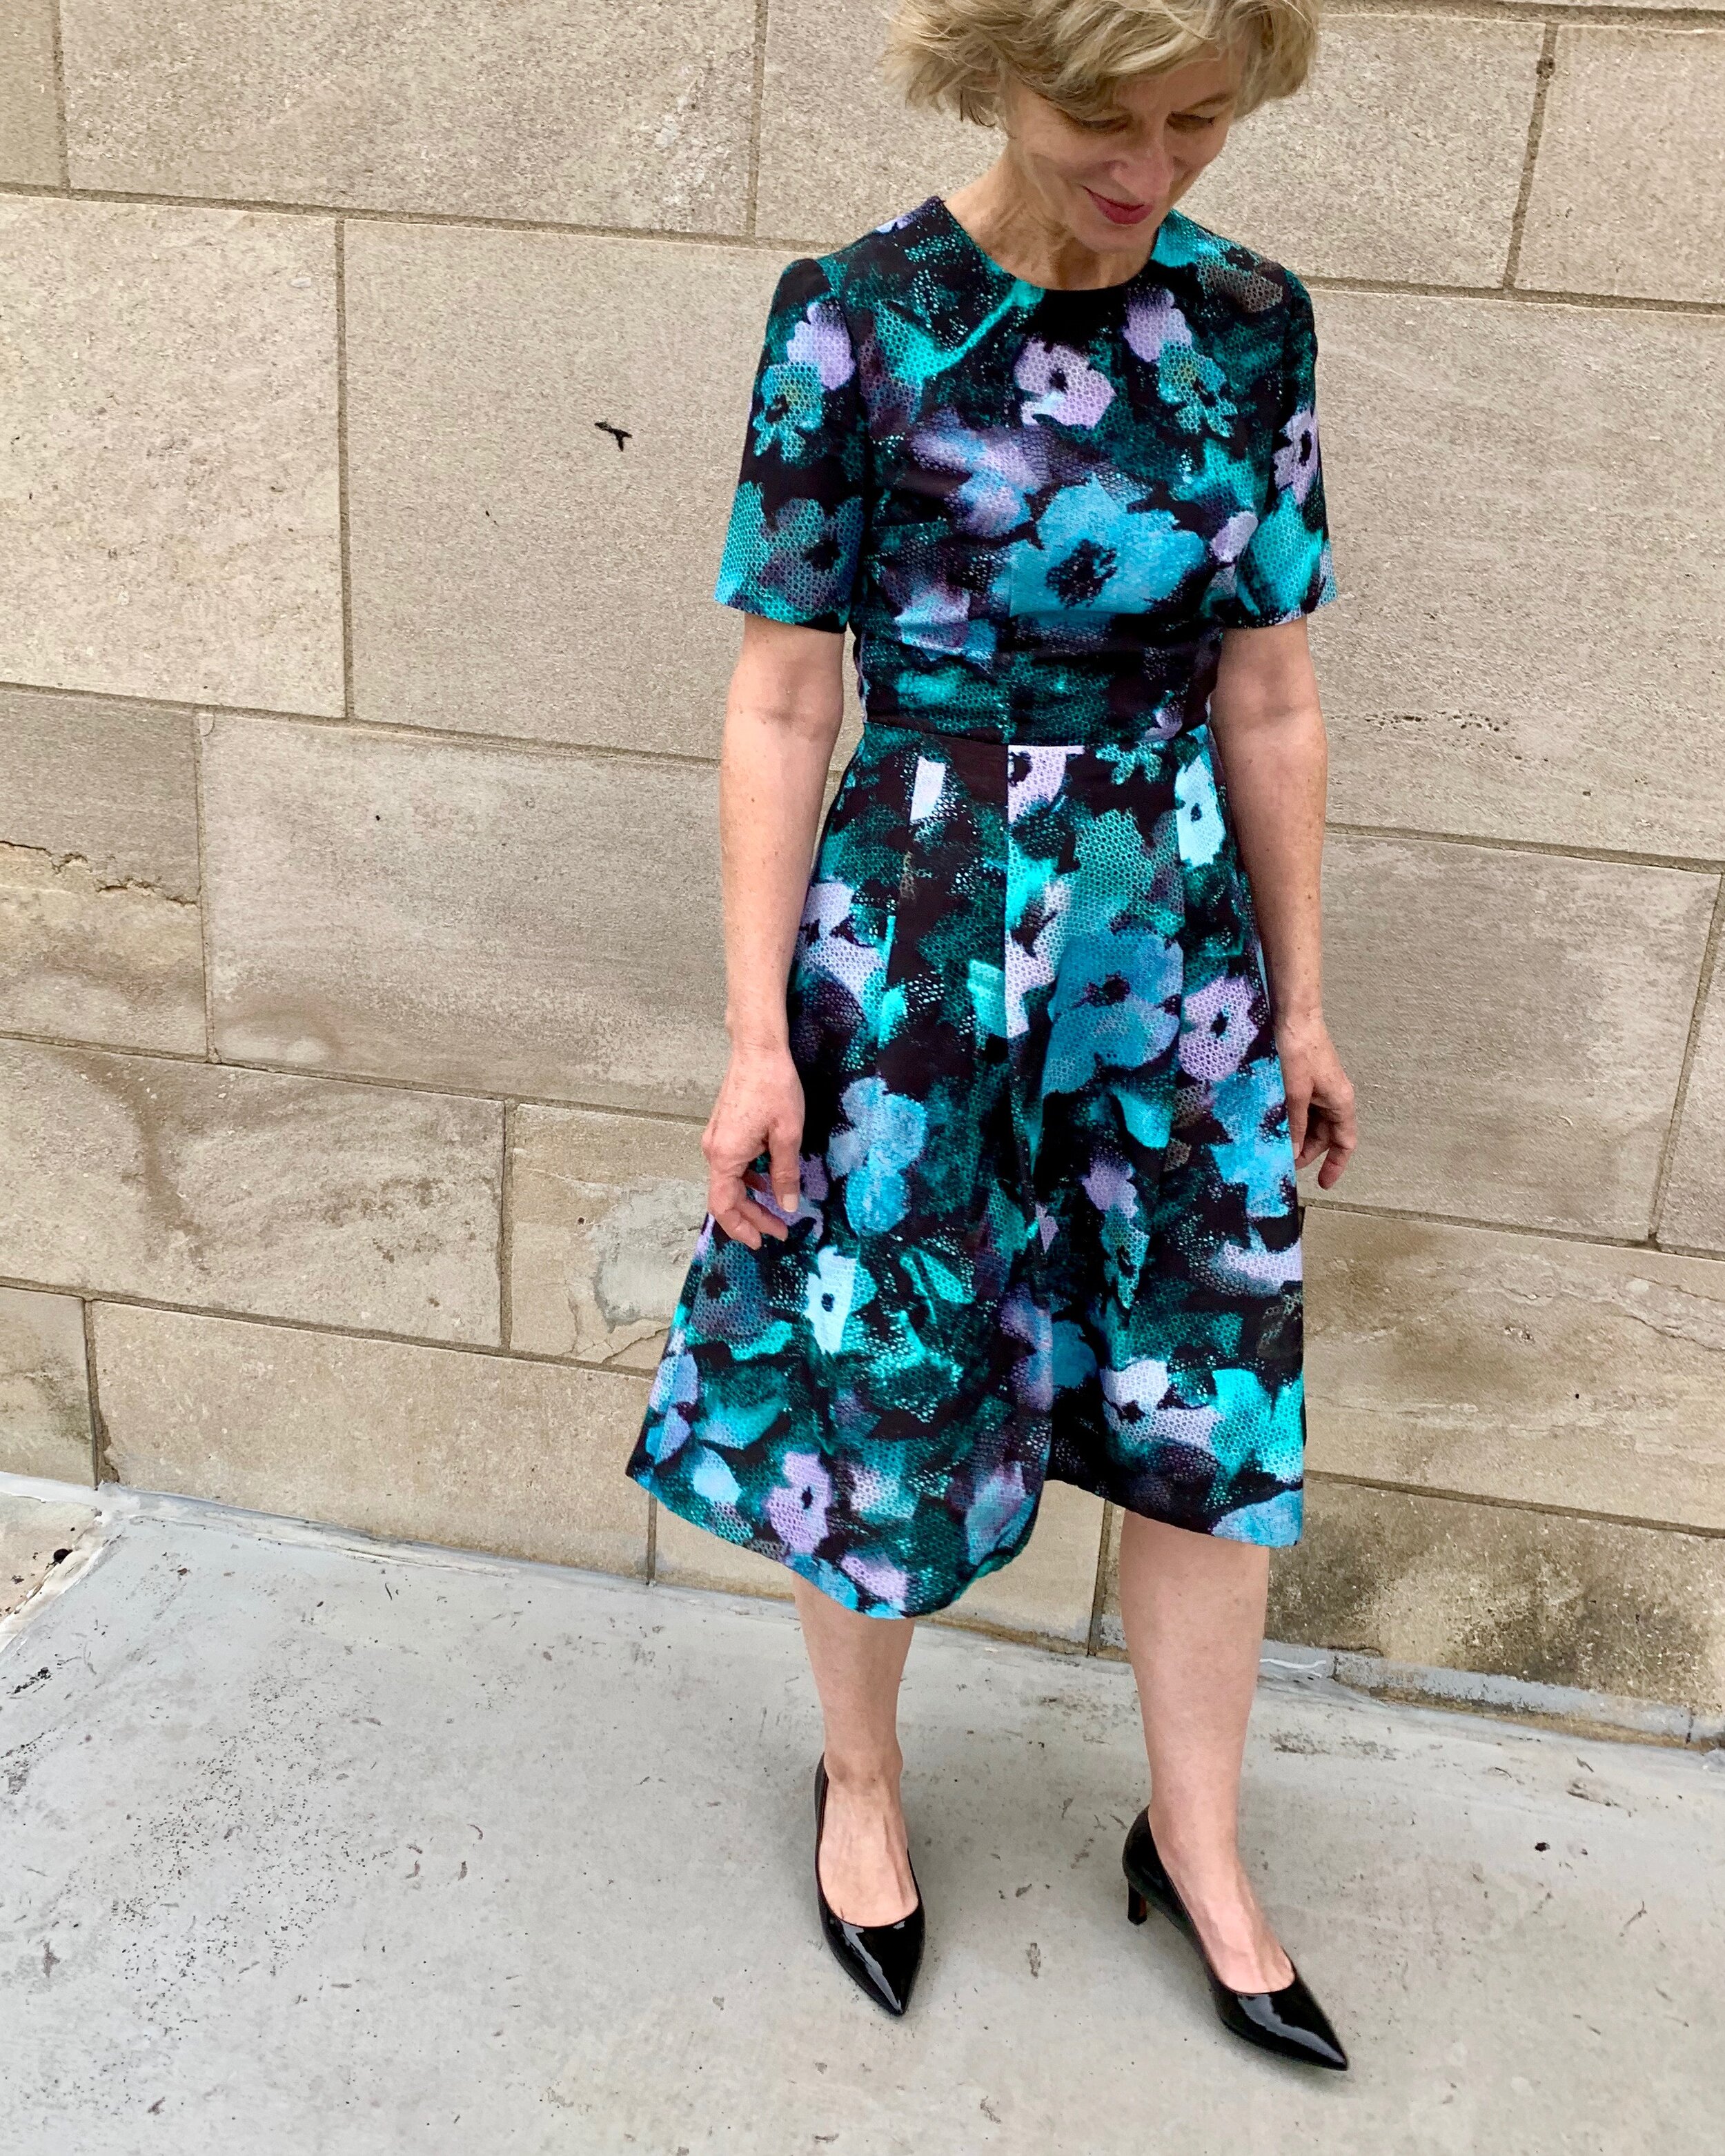
With all of this stay at home time, I find myself poking around in less traveled corners of the house just looking for a diversion.  On one of my weekend adventures nosing around up in the attic, I stumbled upon a narrow swath of fabric leftover from a shower curtain I made for Adam for his first apartment at University of Wisconsin Madison- more than 10 years ago.  The fabric is from Ikea. I really like the print (nordic cool) and even though the fabric is a sturdy home decorating weight, I started noodling around on a dress idea because – unchecked- that’s where my mind goes when fabric is involved. Shower curtain to dress!

IMG_0766.jpg

The fabric remnant was 15 inches wide and over 70 inches long. I knew I would have to pattern block- I am not narrow enough anywhere for 15 inches in width- and the pattern must run up and down.  With those constraints, the dress options were narrowed.  I didn’t want to do anything with much piecing because the fabric is stiff.  However, I must note, I am very drawn to patchwork trend right now and am eager to do a serious patchwork project but that’s another day and not with this scrap. 

For this simple pattern blocking project, it was easy to land on a solid black to balance the dramatic print. I just needed to match the weight of the Ikea fabric so I looked for a canvas or twill weight fabric. This black twill was hands down the best option. I used the wrong side of the fabric for a smoother finish.

IMG_0780.jpg


In order to keep the fabric (and pattern) largely intact, I chose a simple a-line dress. I used my favorite a-line shift pattern -a Cynthia Rowley Simplicity 2584 shift pattern - crossed with some features from Vogue 8945.  My tip for a winning shift dress is the old Goldilocks standard- make sure it’s not too big and not too small. This pattern is a “just right” fit for me so I only had to fiddle with pattern piecing dissection for pattern blocking.

IMG_0748.jpg

I simply cut the front of the dress as wide as the fabric piece allowed and fortunately, that was a well placed asymmetrical line just after the neckline which made measuring and piecing a breeze.  I cut the remaining front from black twill – adding accommodation for ½ inch seams. The back piece was easily cut from the black twill. Two pattern pieces- easy.

IMG_0753.jpg

The other little modification to this shift-is an easy dropped shoulder that I drafted at the armhole without adding fullness to the shift.  I simply drew an extended sleeve for this hack. There is a good discussion (including diagrams and guidance) about the range of dropped shoulder options here

IMG_0723.jpg

The cap sleeve was a good design choice because it was easy to finish the armholes with purchased black bias binding. I also used this binding to finish the neckline. Staying home more than usual during this pandemic has it’s small silver linings. It was a bonus to discover this fabric treasure -and to remember it’s origin story. Best of all, it feels like a “free” new dress.

Sew this pattern: Sienna Shift dress

Although I am frequently out of step with popular culture- talk to my adult children- I try to keep up with fashion trends.  My favorite pursuit is tweaking and adapting a current trend to make it work for me- such as altering the style so the scale will work on my frame –read: I do not have model proportions- or modifying a style a bit so I feel “at home” in it.

I have dabbled in the ruffle trend- but haven’t found the sweet spot. It doesn’t help that every time I make a project with ruffles, the spouse looks it over and announces he doesn’t like ruffles- he says they look reptilian.  Nevertheless, I persist, because now it’s kind of a personal challenge to see if I can re-create this trend in a way that gets a favorable response- or at least feels more like me.  So, here is my latest interpretation of the ruffle trend that I find is more aligned with my style: the Sienna Shift dress from Sew this pattern.

IMG_0258.jpg

 I was drawn to the pattern because the ruffles are not gathered which makes them more subdued.  I also like a shift dress to have some shaping.

IMG_0389.jpg

This is my first go around with this pattern maker, and the drafting and instructions are excellent.  This was a relatively quick and straightforward make- the pattern download and cutting went smoothly and there are not many pattern pieces to keep track of. I am crazy happy with the fit. I cut a size 8 in the bodice –according to the pattern measurement instructions- and drafted out to a size 10 at waist and hips.  I got an excellent fit at the bust line, shoulders and arms. 

I used a dark chambray from Lakes Makerie- which is a fabric that I am comfortable in.

IMG_0317.jpg

I love the ruffle finish on this dress.  I have had more than a few fails trying to achieve a clean finished edge on ruffled projects. This ruffle is finished with a self bias binding on the edges. I think this is genius and works fabulously.

IMG_0282.jpg

I made only two minor modifications to this dress: I added fullness in the skirt after the hip drafting out to a size 12, and I lengthened the skirt substantially for ease of movement and wear-ability. 

In the end, the spouse still pronounced this dress’s ruffles a little bit lizard. But, I am comfortable in the result- which I consider a win.


Trouble on the Silk Road and Vogue 1654

It’s not at all unusual for me to make a dress for an event, but when I put on eye make-up (and take off my specs)- you know it is a serious occasion.  Such was the case on Thursday for our big gala at work. This annual fundraiser was also a celebration of our organization’s 150 years of service and completion of a major housing project. This shindig called for extra effort: both a new dress and extreme power lash mascara. 

IMG_6112.jpg

I found this fabulous green silk at Treadle Yard Goods.  It has a satin finish, but it is much heavier- which is perfect for a winter event here in the North.  I had my eye on the new Vogue 1654 special occasion dress and here was the opportunity. Even though the pattern calls for stretch woven fabrics or knits- and even though I had a couple modifications in mind- the sewing and fitting part of this project was – shall we say- smooth as silk.

IMG_6116 (1).jpg

This pattern is a “custom fit” pattern sized for A, B, C, and D cup sizes.  The A cup bodice was a perfect fit right out of the envelope.  Hallelujah!  Thank you Vogue for offering a pattern with customizable cup sizing!!!   There is a lot of information out there for people who need to make full bust adjustments.  But, I find significantly fewer tips and tricks for modifications for us petite chested gals.  And- because I am a self-taught pattern fiddler- I struggle with making these fit adjustments.  Personal goal is to figure this out in 2020.  Anyway- no need to struggle with bust adjustments with this pattern.

IMG_6092.jpg

I skipped the pleat- by cutting the skirt front on the fold of the fabric- and omitting the pleat line.  I graded the skirt to a larger size to make sure I had enough walking and sitting ease. 

Now here is where we hit a minor bump in the road. It’s the day before the gala, and I try on the dress to determine skirt length for hem, and the sleeves are simply overwhelming. So I completely unpick the sleeves and recut them to be basically a fitted sleeve. It was actually an easy alteration- but I was working last minute- per usual. I also made the sleeves bracelet length- because- well, bracelets!

IMG_5269.jpg

More trouble: I was very careful with pressing the darts and seams.  I ironed on the wrong side of the fabric and used a press cloth.  But I was having difficulty getting a nice pressed finish- because the fabric is fairly stiff. 

So I increased pressure- and oops- the seam dart impression from the other side showed through.  So I skipped ironing the other dart.  As an alternative to the pressure, I used a bit of steam and the iron dripped and suddenly I had water spots, discoloration, change in texture- and almost every other fabric disaster!!! And this is the evening before the event.

IMG_6107.jpg

I went to the internet and found a thread that suggested when pressing silk satin- generally a warm, dry iron and light pressing is best.  Hmmm.  The post recommended using a seam roll and brown paper strips to avoid seam and hem impressions which may show on the front of the fabric.  This seems like great advice, but I didn’t go that far- I only had an evening to finish- and actually, the hem looked fine with a wrong side pressing.  And while the water spots are basically invisible, I had the most trouble with photos and crease lines!

IMG_5774.jpg

I remember reading somewhere- long ago that workers who steam and press in the tailored garment industry make more money than the workers who sew. I have never been able to substantiate this – but it makes sense to me. I really struggle with the iron. I don’t know if ironing can be taught- but I could use a lesson.

In any case- despite a few bumps along the silk dress-making road, I learned a few things and am still pretty pleased with the final outcome!

Faux leather fun for Fall

After a bunch of head scratching, pattern hacking, self-drafted projects- I decided I needed a straightforward- out of the envelope make.  For this project- I went totally auto pilot.  I liked the styling of this Cynthia Rowley Simplicity 1314 pattern view so much, I absolutely (shamelessly) copied it- down to the shoes.

IMG_3711.jpg

 Armed with my leftover faux leather and this pattern, I made the exact dress; exactly out of the envelope; in exactly one size; in exactly the same suggested fabric.  But there you go- I like it and I’m glad I did.

IMG_2561 (1).jpg

I think this dress pattern is super flattering and the fit is perfect. I will definitely re-visit it again- perhaps with a more creative mind!

Because I made absolutely no modifications and the pattern is straightforward - all I really need to talk about is the ease of working with faux leather- if you haven’t before- and also give a shout out the fabulous quality of this particularly beautiful faux leather from Emma One Sock.

Can an imitation be better than the real deal? Faux literally means fake or imitation- not super appealing.  But, after working with this, I am a faux fan.  When I wore this dress last week, a friend asked if it was real leather.  Well-I guess that’s the goal.

IMG_2568.jpg

The only extra step I took was to change my sewing machine needle to a leather needle.  Other than that- everything was straight forward.  This leather has the tiniest bit of stretch so it works perfectly with the black ponte I paired it with- also from Emma One Sock.

 Similar to ponte- the faux leather does not fray and is very stable. 

I am typically careful pressing ponte- I (almost) always press on the wrong side- and use a press cloth on the right side.  This faux leather is viscose backed- so you can feel safe pressing on the back side.  And I used a press cloth on the front with the faux leather- the manufacturer notes you can use a medium heat iron on this fabric.

IMG_2535.jpg

My other faux leather project this month is this super simple bomber jacket.

IMG_2846.jpg

This jacket was meant to be fast and easy.  The jacket is unlined because the viscose back on this fabric is surprisingly comfortable.  And I didn’t need to finish the seams because the simple cut edges on the faux leather are so sharp and clean.

IMG_2852.jpg

Unlike the easy out-of-the envelope dress- this simple looking bomber is actually a hack of three patterns.  I had a jewel neck raglan jacket pattern– but the sleeves were too full- so I fiddled with those and modified a piece from another pattern.  Last, I used a collar and facing pattern piece from a traditional bomber pattern.  The ribbing gets five stars for really pulling this all together.

The only notable thing I did on this jacket is hand hemming.  I didn’t have enough ribbing to finish the bottom of the jacket- like a typical bomber- so I opted for a straight hem.  I experimented with topstitching on this fabric but I didn’t like how it looked.  So I attached seam binding on the hem for a little extra length- and sewed it up by hand. In the end, I really prefer this straight finish over a ribbed trim finish.

IMG_2796.jpg

Vogue 9267 and Simplicity 1873 for weddings and parties

Hey Mississippi River: I’m crossing you in style!

Here I am on the banks of this mighty river wearing a simple mash up of Vogue 9267 and Simplicity Cynthia Rowley 1873 . This is my latest make for special occasions- specifically weddings and parties!

This dress is a perfect wedding guest dress and practically a party on its own.  This fit and flare dress accommodates a full range of dance moves with absolutely no chance of wardrobe malfunctions.  Bonus feature- partying is so comfortable in this breathable all cotton faille fabric that does not wilt or wrinkle like a wallflower.  This amazing fabric holds its perfect shape, even when you start to droop- or if you have to walk through some autumn sprinkles like I did! To top it off- the print is super cheerful- look at it cheer up this moody river landscape.

FullSizeRender.jpg

I blended two party dresses for this special occasion dress.  I used my favorite Simplicity Cynthia Rowley for the bodice and lovely Vogue 9267 for the perfect full-not too full skirt.  While V9267 could be a perfect choice on its own, I decided to keep the bodice super simple to showcase the fabric.  I also knew the Cynthia Rowley bodice pattern was a great fit- because I have used this before. I am partial to Cynthia Rowley patterns for Simplicity. I have used them time and again as my base for a project. I used Cynthia Rowley for dresses blogged about here and here. This finished dress styling is effortlessly no nonsense: practical jewel neckline, short sleeves and a perfect skirt. 

The dress was also a party to make up. This project was completely straightforward with no pattern modifications- except using the top and bottom from two patterns; and no lining was necessary with the sturdy fabric.

IMG_1847.jpg

This dress is an easy win because of the attributes of this amazing cotton faille fabric. I purchased this particular fabric from EmmaOneSock, but the same fabric is currently available at Mood. Faille isn’t a super common fabric choice. Faille is defined as “a fabric woven with slight ribs from silk, rayon or cotton.” Faille fabric is woven with heavier weft yarns and finer warp yarns to create a very fine rib. This magical weave produces a silky and wonderfully lustrous surface. Below you can see a close up of the fabric and the narrow skirt hem- hand sewn because that’s the way I roll with hems! Also, the fabric has a little stiffness so that was the easiest method. You can see the ribs on the wrong side of the fabric.

IMG_2588.jpg
IMG_2585.jpg

Silk faille is often used in evening wear. This particular fabric has fabulous body and a dressy sheen that is NOT shiny. Just dressy. While faille is often produced in silk- this gem is cotton- so pretty and so practical- which is also the way I like to roll as a party guest!

IMG_1868.jpg