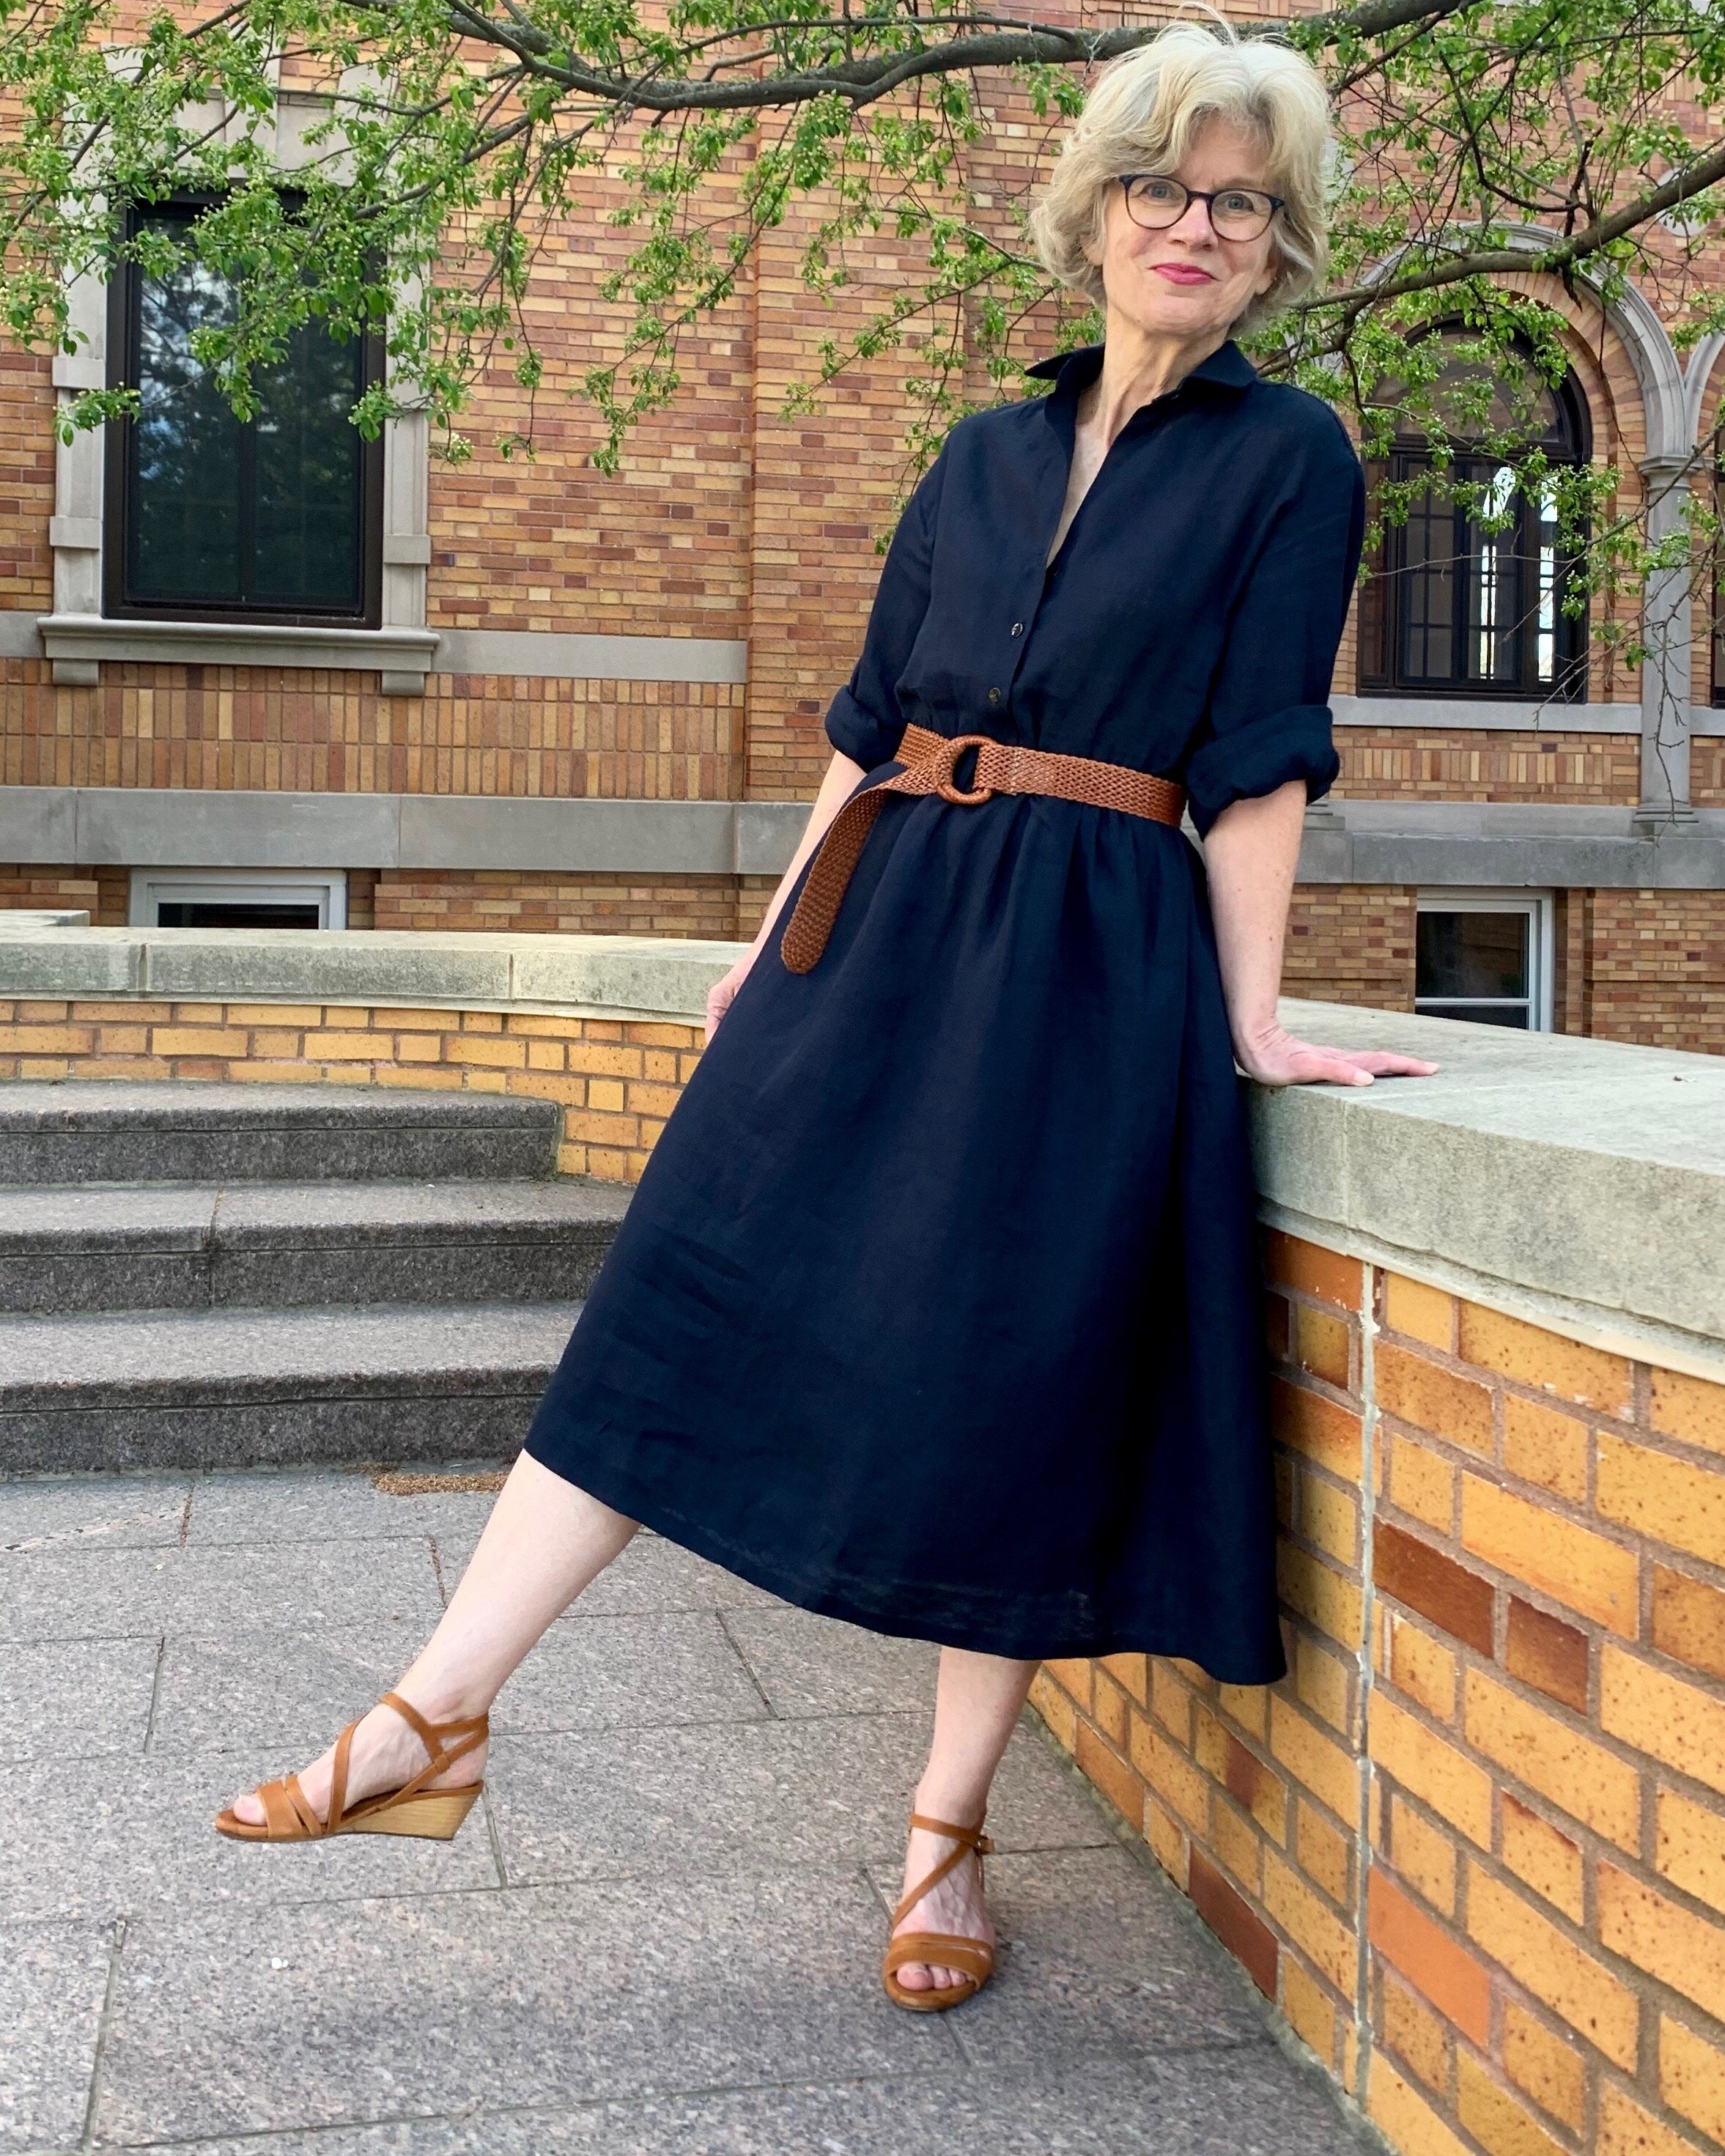
Refashioned Linen Shirtdress

Here’s a story about a remake times two.  I have a navy linen shirtdress that I made for myself several years ago that proved to be an amazing wardrobe work horse.  It was appropriate for practically every occasion: work, travel and play -dressy or casual.  But- years later- it is now too faded and too small/short? to keep performing it’s all star role in my closet.  I wear it around the house, but that’s about it- so I set about making a replacement.

IMG_3308.jpg

I started this replacement shirt dress saga by making a kind of mashed up and hacked version of Grainline Studios’ Archer and Adler patterns. I have made several Archer shirts (blogged about here) and often use it as a base for other tops and dresses. For some reason, I was feeling extra and I added a waistline and a very big gathered skirt.  This particular linen- purchased from Stone Mountain and Daughter Fabric -is a little bit opaque, so I thought a full skirt would eliminate the need for a lining- and maybe I was having a ball gown moment.

IMG_3572.jpg

If we are talking about versatility- I think navy is a champion color and I have quite a bit of it in my wardrobe. Linen is also definitely an all-around versatile fabric.  This particular light weight linen has dual magical properties: it is both crisp- see that collar- and it drapes.

IMG_3890.jpg

I had fun twirling around in the dress for pictures and I liked it styled with different belts and shoes for different feels- but after the picture-taking session, the dress hung unworn in the closet – and lingered unworn, and almost disappeared.  What the heck?  I made this expressly because my other navy dress was so wearable.

 So I decided the dress needed a significant overhaul- or refashion -to make it more wearable.  I made a few key changes to the skirt and sleeves to give this dress a more easy going, laid back and much less structured feel. 

IMG_6324.jpg

Let the unpicking begin! First, I completely took off the skirt and reduced the fullness, which made a big difference in the feel of this dress. I added a full button closure down the entire length of the skirt, and I also attached a casing and made a drawstring waistline for comfort and super easy style.  Last, I shortened the sleeves to relaxed elbow length.  Now it’s a great one and done every day kind of dress.

IMG_6805.jpg

It feels more versatile and I can still change it up a bit with belts, shoes and other accessories.

IMG_6635.jpg

I love how linen is a season spanning fabric.  This navy linen is suitable when the weather is cool, and we all know linen is the perfect fabric in a heat wave- and (surprisingly) it actually gets very hot and humid here in Minnesota in the summer. I wore the dress to brunch on the patio this weekend in extreme heat and it was perfect. This navy shirt dress- third edition- is a winner.

IMG_6267.jpg

An Interior Roman Holiday in Closet Core Cielo

Italy is increasingly haunting my dreams.  My longstanding love affair with this country began when I was a student in Rome in the 1980’s.  Because European travel is still on hold, I decided to pacify my Italian craving by creating my own interior Roman Holiday with the Closet Core Cielo dress- this dress, hanging out at the Romanesque styled Lady of Victory Chapel nearby and consuming plenty of pasta seems to be the best way to satisfy my appetite for all things Italian.

Pre-pandemic, I picked up this fabulous Ruby Star yarn dyed warp and weft heirloom fabric from Lakes Makerie.  It is whisper soft and extremely lightweight- yet not transparent- which makes it a perfect choice for an easy breezy summer dress.  During the recent heat wave, it was especially pleasing to work with and perfectly cool and comfortable to wear.

I purchased the Cielo dress pattern not long after it debuted as part of the Rome capsule wardrobe collection by Closet Core patterns.  I also purchased and made the Pietra pants which were part of this collection –and blogged about here.   I love my Pietra pants and have made a couple pair, but I never got around to making the Cielo- I seemed to be endlessly waffling over fabric choices.  Check out other makes and you will see that the Cielo pattern can work with pretty much any fabric and will give a different look depending on the substrate used.  I liked so many of the variations.  With such a wide open playing field I was paralyzed from making a decision.

When I finally landed on the Ruby Star fabric, I quickly got down to business.  First, I was a little concerned about scale.  I studied other Cielo makes and discovered several sewists sized down.  When I consulted the finished garment measurements, I decided to size down to a 0- a very bold move.  My regular size for Closet Core pattern would be a 4 to 6 in the bust.  I cut a size 0 from the top neckline to the bust line and then graded out to a size 8 at the hips- close to my measured size.  I also lengthened the dress.

FullSizeRender (1).jpg

This is a super quick sew with no zips or snaps.  Love that- making this dress was like a vacation.  I chose to finish the neckline with facings instead of bias binding because I am a big fan of a faced neckline.  I like the look and feel you get from a faced and interfaced neckline- the facings provide a bit of structure that the garment can hang from.  This fabric is particularly soft so the facings help provide shape. After easily putting the dress together, I tried it on and I felt a bit too angel wings in the shoulders and sleeves.  So I unpicked the sides and scaled down the armscye a bit by using a pullover woven tee pattern to help with the drafting.   And then I put the dress back together.

IMG_3645.jpg

I think the Ruby Star warp and weft earthy umber color has an Etruscan vibe and certainly helps achieve my interior Italian frame of mind.  I look forward to wearing this in Italy- when foreign travel is an option again.

IMG_4356.jpg

A Kalle Shirtdress and a sense of proportion

 I feel pretty confident in my ability to get a garment to fit- I have been working on that for years and getting a good fit is really one of the big reasons we sew.  But, what do you do when the style trend is oversized?  I am constantly drawn to oversized and chic easy looking styles – particularly this year when I seem to seek comfort wherever I can find it. Despite the attraction, once I put a finished oversized project on, I feel a bit overwhelmed, and I often find myself scaling down an oversized pattern to become more of a fitted pattern.  I used to think I couldn’t do oversized because I was short- but I have learned that is not the reason.  There are plenty of petite women who rock the oversize trend and at 5”4” I am technically not considered petite.  Truth be told- I tower over all of the other women on our block.  Seriously I feel like a giant in my neighborhood- it’s weird.  Proportion isn’t just about height.  There are other considerations such as long legs or long body etc.  The trick is to get the proportion mix right.

FullSizeRender (5).jpg

I was sold on an oversized and easy look for this Kaufman mammoth flannel purchased from Lakes Makerie.  This fabric is soft, thick and heavy and oozes comfort. One thing about plaid flannel is you have to consciously avoid potential pitfalls.  Potential pitfall number one: avoid looking like a lumber jack- even though it is an iconic look here in Minnesota.  Pitfall number two: try not to look like I’m wearing the spouse’s flannel shirt.  That look is chic on young cool girls but often young chic fashion looks simply won’t work for me.  Finally, I didn’t want to look like I am ready for bed- even if that is more often true than not.  That said, I wouldn’t mind feeling like I am heading to bed, just not looking like that’s the case.

FullSizeRender (4).jpg

I decided to make the Kalle Shirtdress by Closet Core Patterns with long sleeves.  This is a slightly oversized style with dropped shoulders and lots of ease through the body. I have my all-time favorite tried and true shirt dress pattern blogged about here and here, but this pattern is closer to the roomy, comfy look I was going for.  I cut a straight size 4 which is the size that matches my bust measurement. I did not grade out for waist and hips as I would need to do for a tailored style. There is plenty of fullness in this pattern, and I actually reduced some of the back fullness with a narrower back pleat.

This plaid is balanced which makes pattern matching so easy- but I still am pretty proud of my placket.  It took more than a little thinking. I kept the placket simple without buttons- not because I am lazy- but to keep it clean and unfussy.

IMG_4401.jpg

You will notice bracelet length sleeves, which I admit up front are a big measurement mistake.  However, I usually roll up my shirt sleeves because even when I am at my desk- there is a lot of hand-washing in a day and I hate soggy cuffs.  So these bracelet sleeves might actually be a genius design feature.  And for some reason, I like the proportion.  So maybe I got the proportions right?

FullSizeRender (1).jpg