Lotta love: Pilvi and Esme

Pre-pandemic, my sewing plans for March included making a project (or two) from the sewing book Everyday Style by Lotta Jansdotter. I had my eye on this book for nearly a year, and I finally got the nudge I needed to purchase it when Sue Stoney and Ali @robinsnest1926 announced a Lotta challenge on Instagram.  I love the Scandinavian design and styling in this book- it is modern, unfussy and joyful. As it turns out, sewing from Everyday Style was the perfect antidote to our current upended world. The projects I made provided a much needed tonic for these complicated pandemic days. Both of the projects are happy and effortless.

IMG_0823.jpg

I made the Esme Tunic first.  I am one of those rare birds that actually likes a woven pullover top.  I think it’s because I am most comfortable sewing woven fabrics.  The Esme features a great looking neckline and French style darts and facings.  I made a wearable toile from a Japanese cotton canvas from Treadle Yard Goods that I found in my deep stash.  I think I actually purchased this material for a home dec project that went wayward.  This isn’t a color I normally wear- or let’s be honest- previously have never worn!  But, it sure is happy, and yellow is definitely prominently featured in the styling in this book. 

IMG_9706.jpg

First step is to trace off the pattern pieces.  The seam allowances are included- so it’s actually super quick.  Also the top has only a few pattern pieces.  I cut out a straight size extra small even though according to the measurements, I should have graded out a size for waist and hips.  But the top looked like it had plenty of ease and that was a good call.

IMG_9697.jpg

This is a super straightforward and simple top.  I like the easy cut and -I may be old school- but I actually prefer a neckline facing to bias binding.  There is plenty of ease across the back and shoulders and through the sleeves- bonus.  This proved very comfortable to wear- the drafting is spot on.  The instructions call for top stitching around the neckline, but I omitted that because the print is busy.  I simply under-stitched the facings and they lay perfectly flat. I found I had only an inch for a hem which I think looks a little skimpy if it’s top-stitched, so I hand sewed a blind hem. 

IMG_9698.jpg

My second project from the book is the Pilvi coat- which is actually the pattern that first attracted me to this book.  This is a super clean and simple style. The only trick was finding a fabric that was interesting but not crazy. I happily stumbled over the fabric of my dreams at the Sewing Lounge.  The fabric is PERFECT for this coat.  It is a hefty polyester jacquard with great body and a fabulous happy print.  Again, this fabric and pattern proved to be a necessary mood boost for troubling days. 

IMG_0232.jpg

I LOVE the look and fit of this coat.  It is easy and comfortable and the raglan sleeves give perfect range of motion.

IMG_0293.jpg

The only tiniest complaint is the sleeve length is short.  I like a three quarter sleeve length, but I had minimal length for the hem on the sleeves.  For reference I am 5’ 4”.  The coat body length, however, is generous- I had to trim 2 inches and still had a substantial hem.

The only time consuming part of this project is finishing the seams.  I used a Hong Kong finish- which I discovered is not the same as a bias finish- explained beautifully by Colette here.  For my Hong Kong finish I purchased bias tape- since the fabric is polyester a cotton polyester blend is perfectly fine and the store bought blue was a good match. For a Hong Kong finish, the binding on the wrong side of the seam allowance is left unfolded- which reduces bulk. For directions on bias bound seams, see Colette’s instructions here.

IMG_0899.jpg

Both the Esme tunic and the Pilvi coat patterns are also remarkable because they are modeled in the book by women who are 50 years of age or older. Definitely LOVE and am happy to support pattern makers who include older models in styling and other marketing for the pattern. Thanks Lotta!

IMG_0316.jpg

Blue Velvet- for Spoolriver’s first birthday

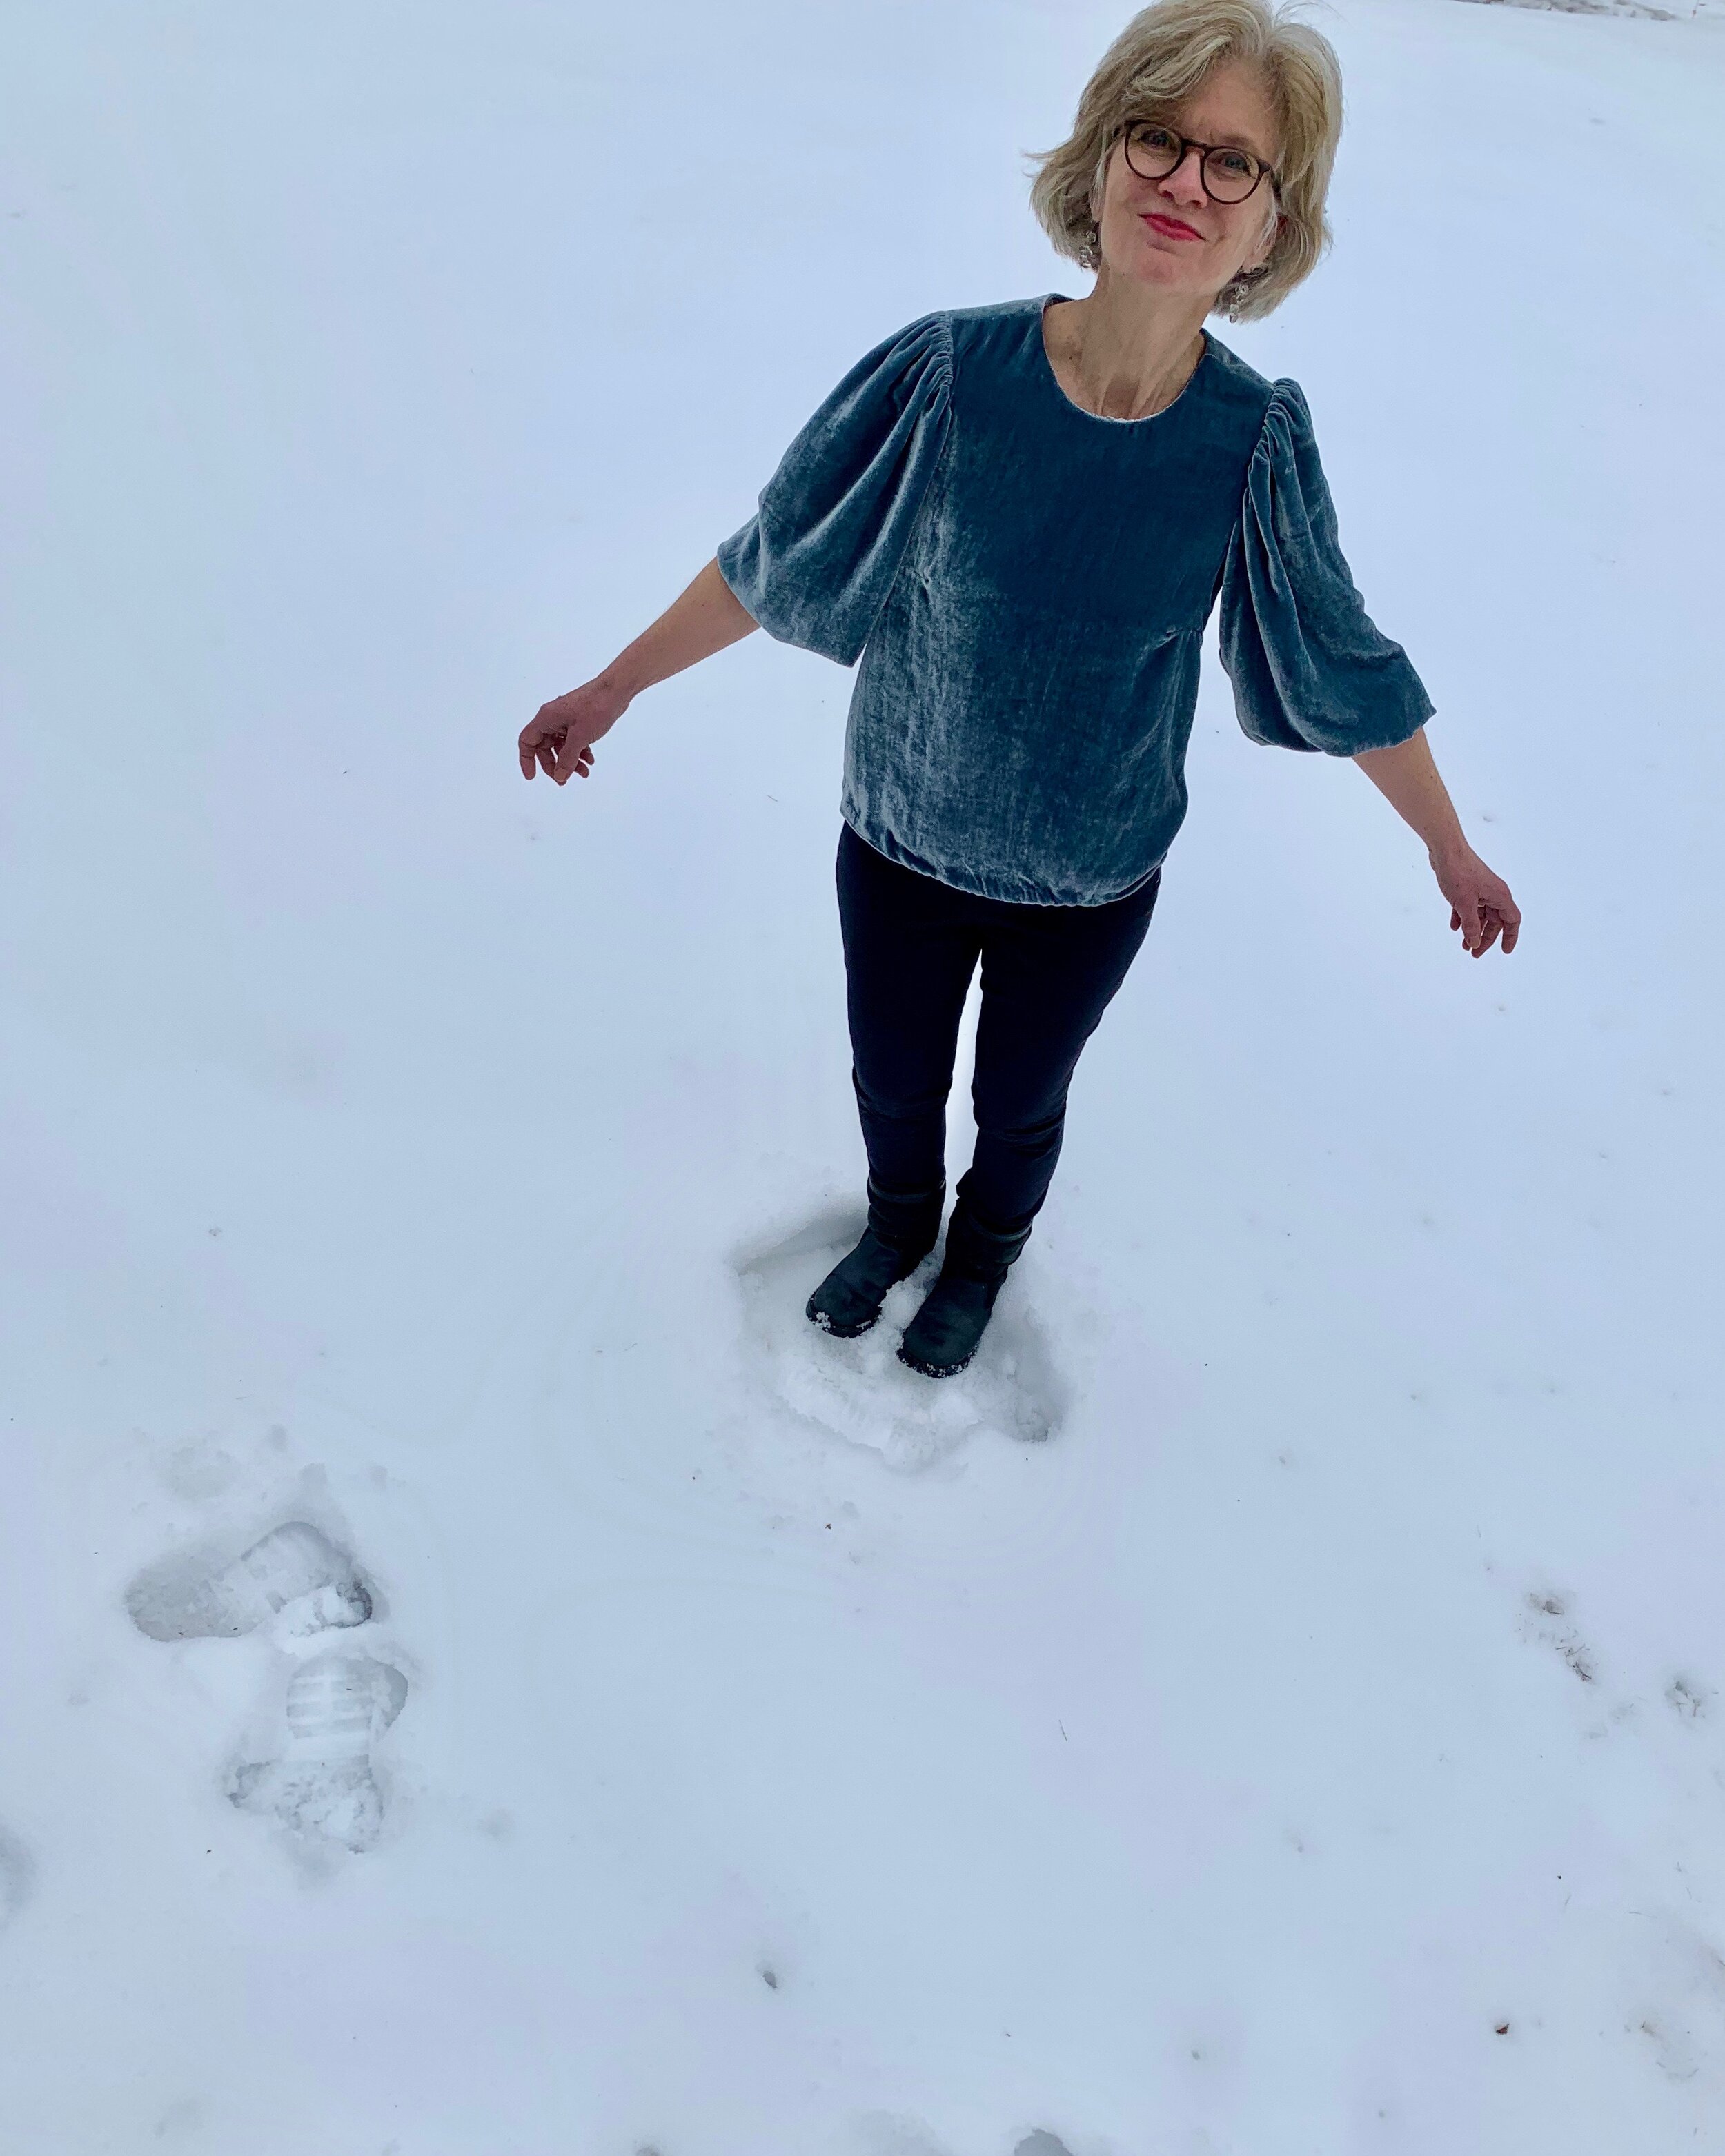
Here I am dressed up in velvet in honor of the one-year anniversary of my blog.  Happy Birthday Spoolriver! Am I impractical to be wearing Blue Velvet (cue Bobby Vinton)? Absolutely not!  Am I involved in a noir mystery directed by David Lynch? I don’t think so! No, I am simply honoring a monumental year for me. And, actually, this was a private party.

IMG_7461.jpg

So, here is why velvet is a practical party top.  I wore this top on Christmas Eve and Christmas day and was absolutely comfortable- even while sweating over cooking and serving sit down dinner for 13 and organizing next day’s pot luck dinner for 36!  And, unlike the sequined top I made for New Year’s Eve- I don’t leave a trail of sequins wherever I roamed.

I was struck by this beautiful blue silk velvet at the Fabric Store and knew it would be perfect for festive winter occasions.  Velvet may put people off, and I admit, it can be a little finicky to work with.  But silk velvet is both cozy and breathable -it’s a natural fiber.  It is sumptuous and luxurious, yet if you don’t lead a luxurious life- (read, I do the dishes) it is not precious.   I wash my silk velvet on delicate in the washing machine. And I wear it outside!

IMG_6663.jpg

I chose an easy silhouette for this fabric- which I recommend when sewing velvet.  Even though this is essentially a boxy top, I included subtle shaping with darts and gathers. This model is self drafted. Sewing velvet requires a little extra care because of the nap or fuzzy pile to the fabric.  There is a nice beginners guide to sewing velvet at Seamwork.  With this simple top, I really only had to take a few extra steps.

I make sure (double check) that all my pattern pieces are laid out on the fabric in the same direction- top to bottom of the garment.  I choose to lay them out the direction of the nap.  To figure out the direction of the nap, I simply run my hand slowly up and down the fabric- the direction that feels smooth is the direction of the nap or where the pile (or nap) is running down the fabric.  I choose that direction –pile running down- when I layout my pattern- because that’s what I was told- long ago.  But I recently read that you may want to choose the other direction (against the nap) if you want the garment to look more saturated. Whichever direction you choose, just make sure all pattern pieces are running the same way.

I use tailors tacks to mark darts or notches.  But- I typically use tailor tacks to mark- so this is no big deal

Last, I pin (with so many pins) all seams to avoid fabric creeping.  This is actually the most important precaution.  Velvet shifts when you sew it because when you put two layers of fabric- right sides together – the nap (pile) causes the fabric to shift against itself.  Trust me- it really moves- it may even be worse than sewing with slippery and shiny fabrics! I know the recommended and best way to avoid creeping fabric is to hand baste seams.  But I simply can’t be bothered with hand basting.  When I made my first silk velvet garment long ago, a sewing friend gave me the following advice: “Just pin the *&%$!# out of it.”  So that’s what I do- and it works for me.  I pin at least every 1/8th inch.

IMG_7464.jpg

The only other fiddly aspect of the top was the hem.  I originally hand stitched a hem- but the hemline looked all wobbly and terrible.  Here is the wobbly hem on Christmas Eve before the guests arrived.

IMG_6286.jpg

To improve the look, I simply added elastic to the bottom.  The finish is now both tidy and stylish and I like it better.

IMG_6518.jpg


StyleArc Sadie Tunic

I am constantly looking for an easy and interesting woven top.  I love my button downs, but sometimes I am in the mood for something a bit less serious- but still classy.  I experimented with several tunic style tops, but had yet to come up with a winning style. Then, I stumbled upon the Sadie by StyleArc. I was tempted by the Sadie because of the classy and interesting features:  the sweet boat neck, the French darts, the interesting hem finish, and those sleeves!

IMG_3633.jpg

This was my first StyleArc pattern and I ordered the PDF online.  The multi size pattern pieces and instructions were clear. I cut my usual pattern size and the fit was TTS.

I eliminated the back closure because I knew I wouldn’t need it with the wide neck.  I also shortened the tunic which is a typical adjustment for me.  The fabric is a linen cotton blend from the fabulous Treadle Yard Goods- a winning solid- not quite solid.

IMG_0684.jpg

The sleeves were totally a blast to put together. A bit of a puzzle and a fun surprise. I just followed the clear instructions. They remind me of origami projects- where you aren’t quite certain what will turn up until you fold, turn and reveal.

IMG_0926.jpg

The top is easy to make and super comfortable as a throw on and go option.